Sunday Brunch: DIY Red Beer Bar & a Layered Potato Baked Omelet

DIY Red Beer (AKA "Beery Mary") Bar

DIY Red Beer (AKA “Beery Mary”) Bar

In much of the rest of the USA, Sunday Brunch is a competitive social endeavor.  Restaurants, soccer moms, sports tailgaters, BBQ enthusiasts, and country clubs vie for popularity in the brunch time slot:   That halcyon time when everyone leaves church, and are starving, but want to show off their fancy duds in public before they head home and put on sweatpants.

A Bourbon Gal and Hoss on Hops= Trouble

A Bourbon Gal and Hoss on Hops= Trouble

Not so much in Utah.  For most of the Beehive state’s denizens, Sunday means church and family, with neither commercial nor social deviation outside this box.  It goes without saying that both caffeine and booze are verboten.  My LDS* friends also often fast as part of their weekend of prayer and mindfulness.  I will repeat in case you missed it the first time:  No coffee.  No Mimosas.  Non-Atkins induced food deprivation. I know, I’m constantly amazed at their fortitude, too.

In case you are still hyperventilating at the thought, perhaps you just need a little re-visualization. Since I moved to Utah over 8 years ago, now Sunday morning means a wide open playing field for we non-Mormon remainders:  Bring on first tracks in the fresh powder!  Hassle-free trips to Trader Joe’s, Home Depot and Costco!  Irish pubs showing European football (but you can only get a Bloody Mary after 12)!  Sure, kids, you can play in the street- there’s no traffic!  Breathe deep, you’ll get through it too.

Okay, so, back to today.  This weekend it was my turn to host our rotating “beer-vana” group.  Between baseball, lacrosse, turkey hunting season and the general mayhem of spring, it’s hard to find a weekend night when we can all meet up with all of our kids.  Thus: we met for Sunday Brunch.

Saketini and Smoked Porter digging in.  Well, Sake will after her Pepcid kicks in #asianproblems  Love ya, girlfriend!

Saketini and Smoked Porter digging in. Well, Sake will after her Pepcid kicks in #asianproblems Love ya, girlfriend!

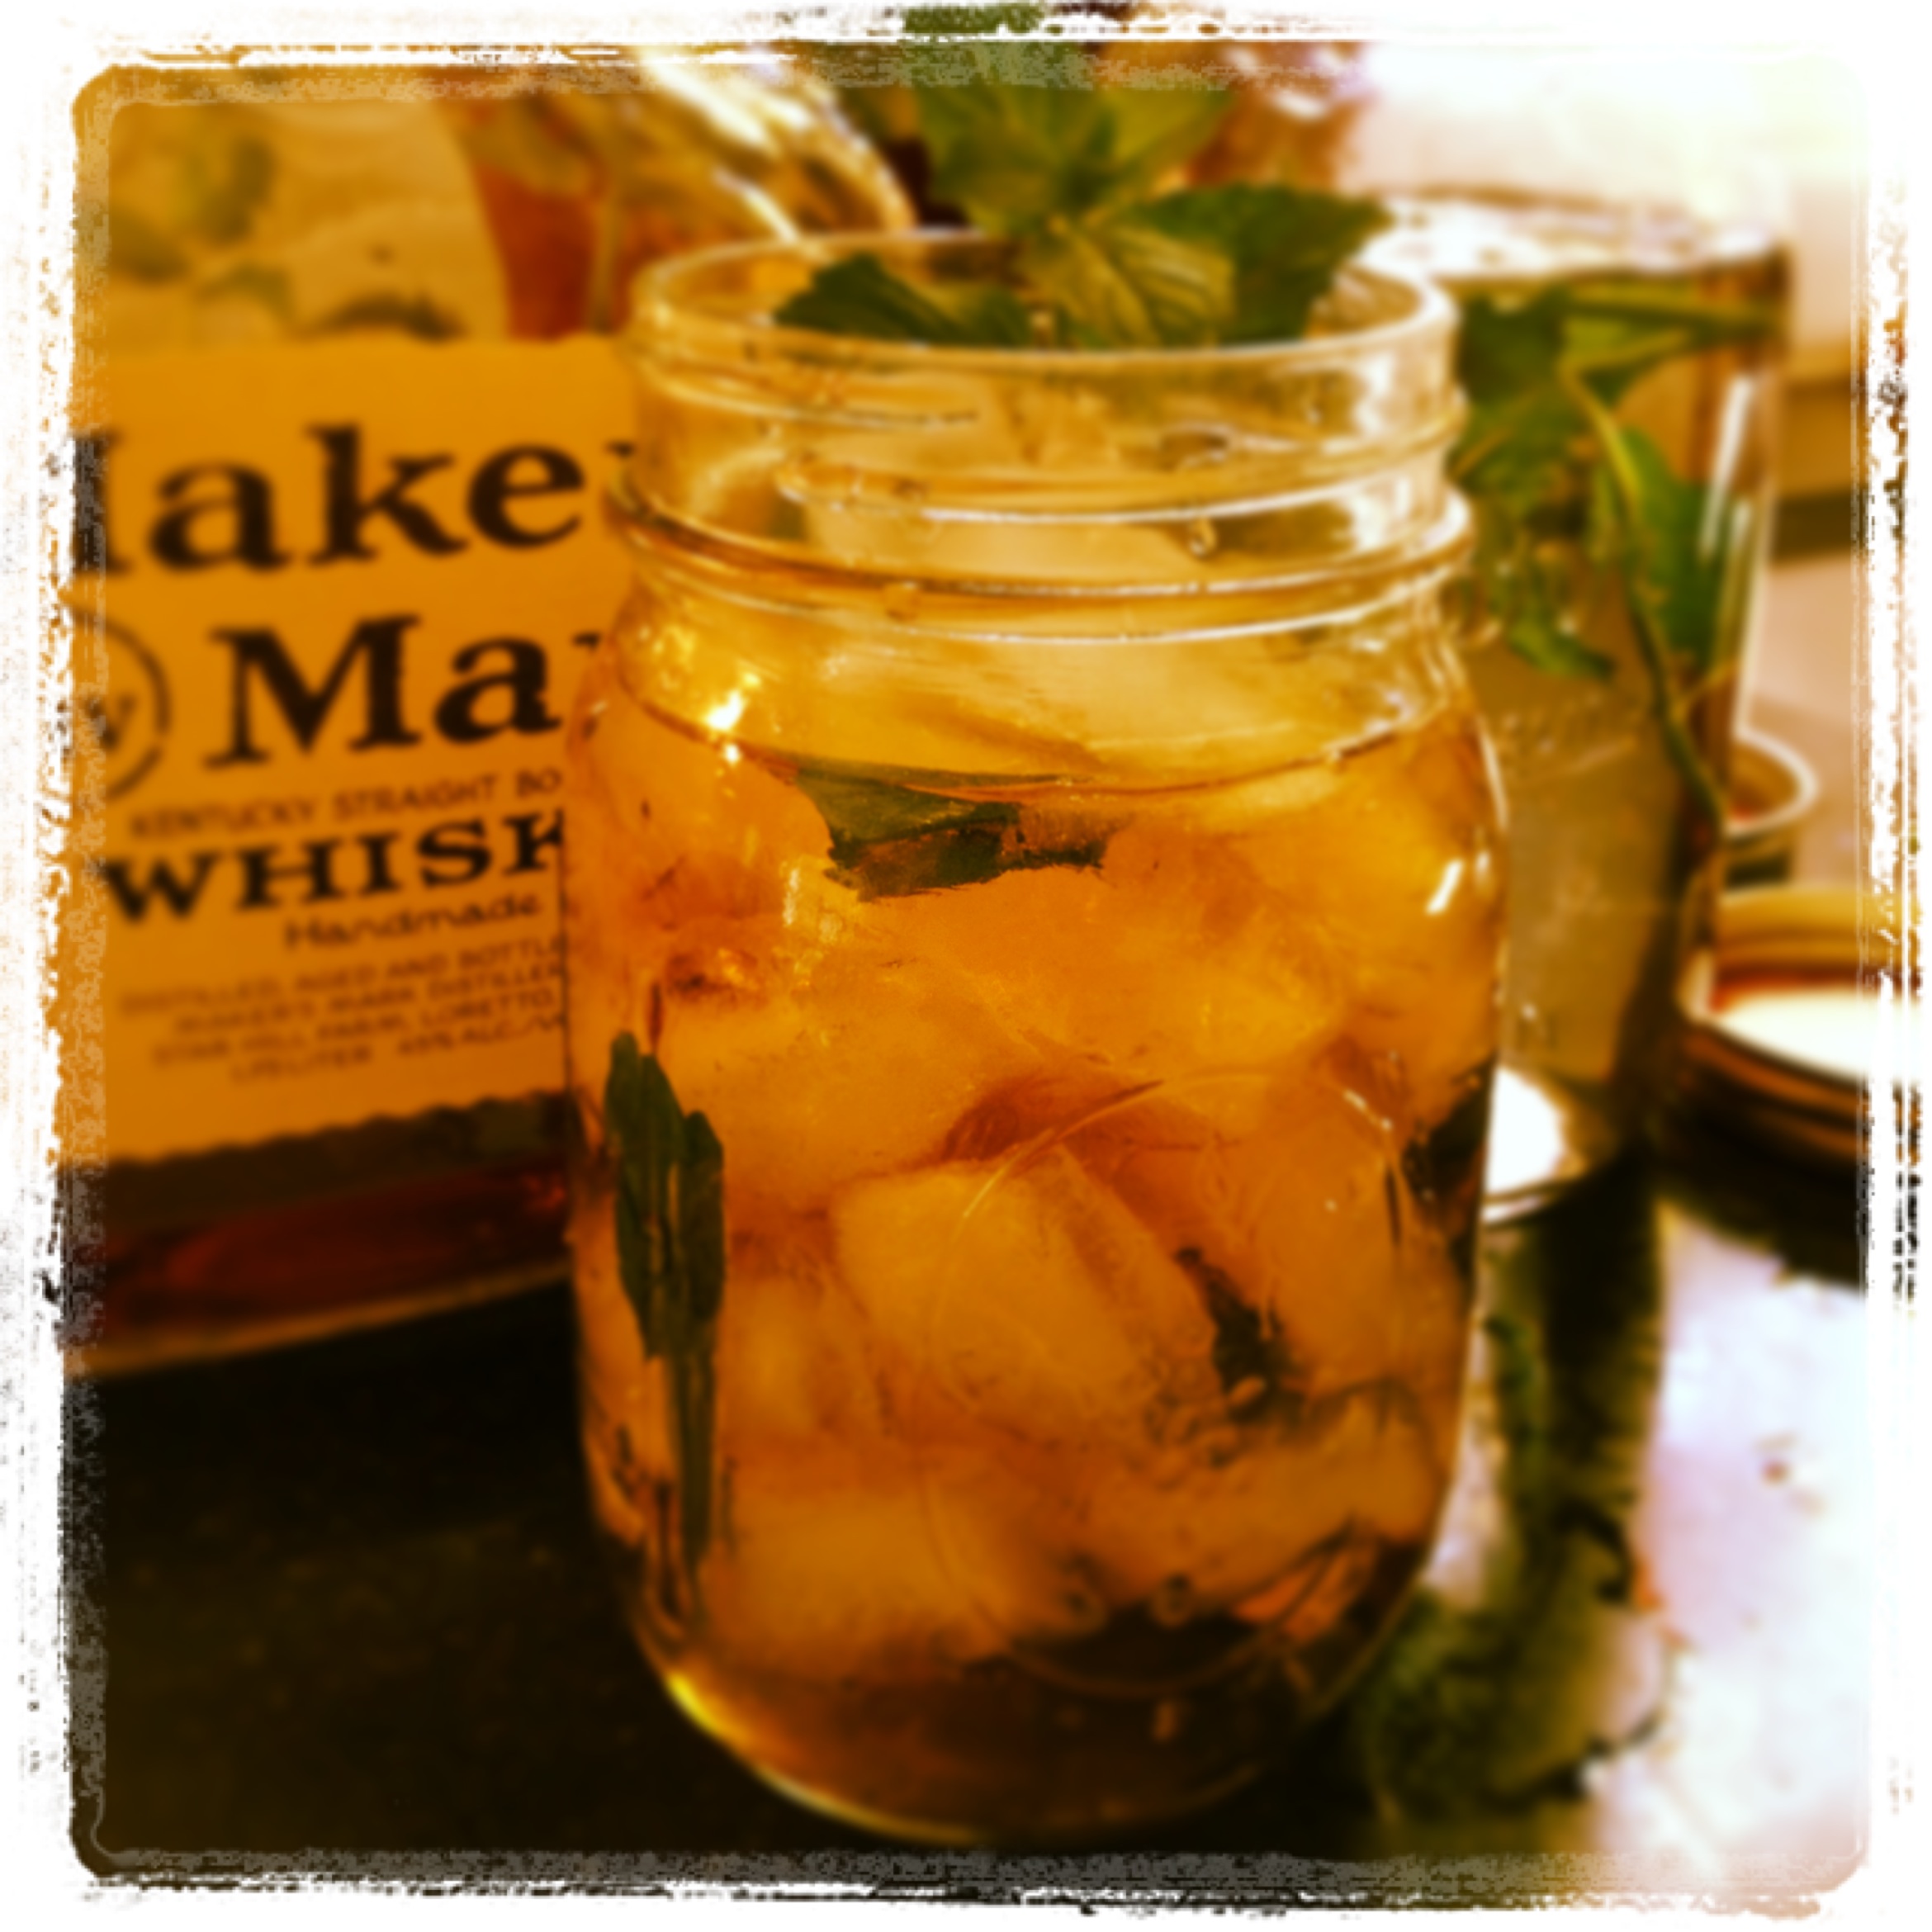
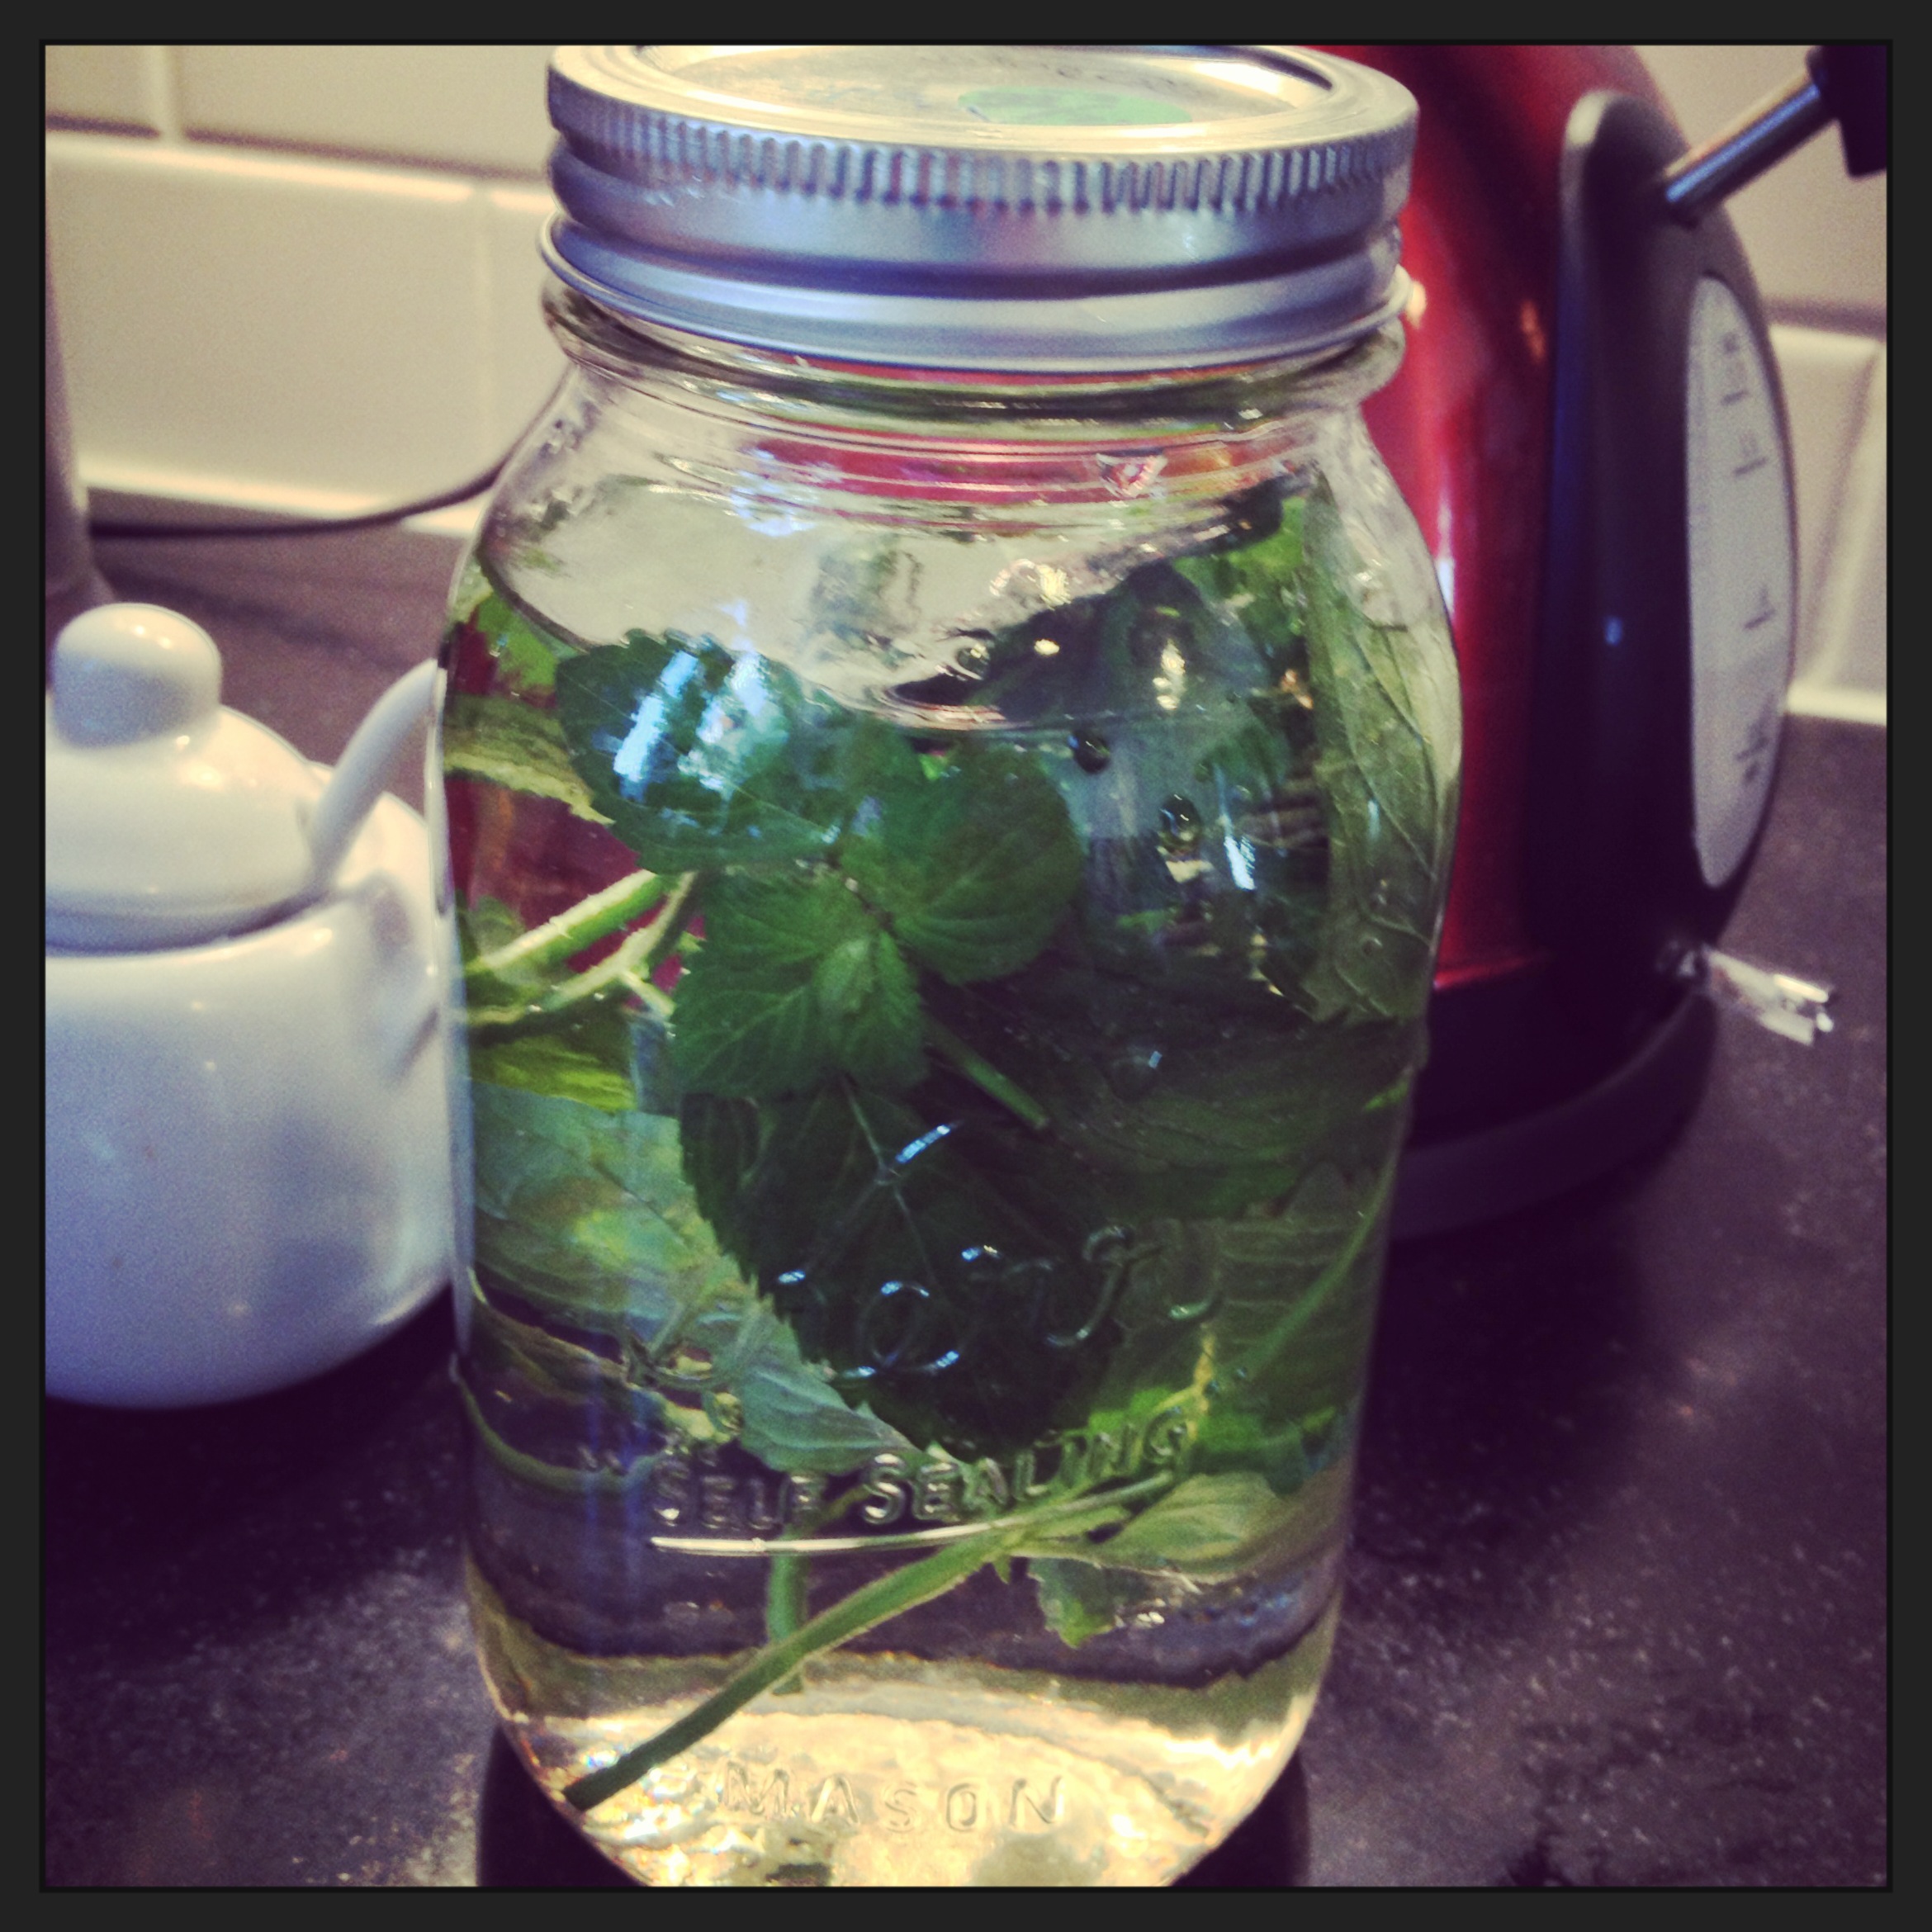
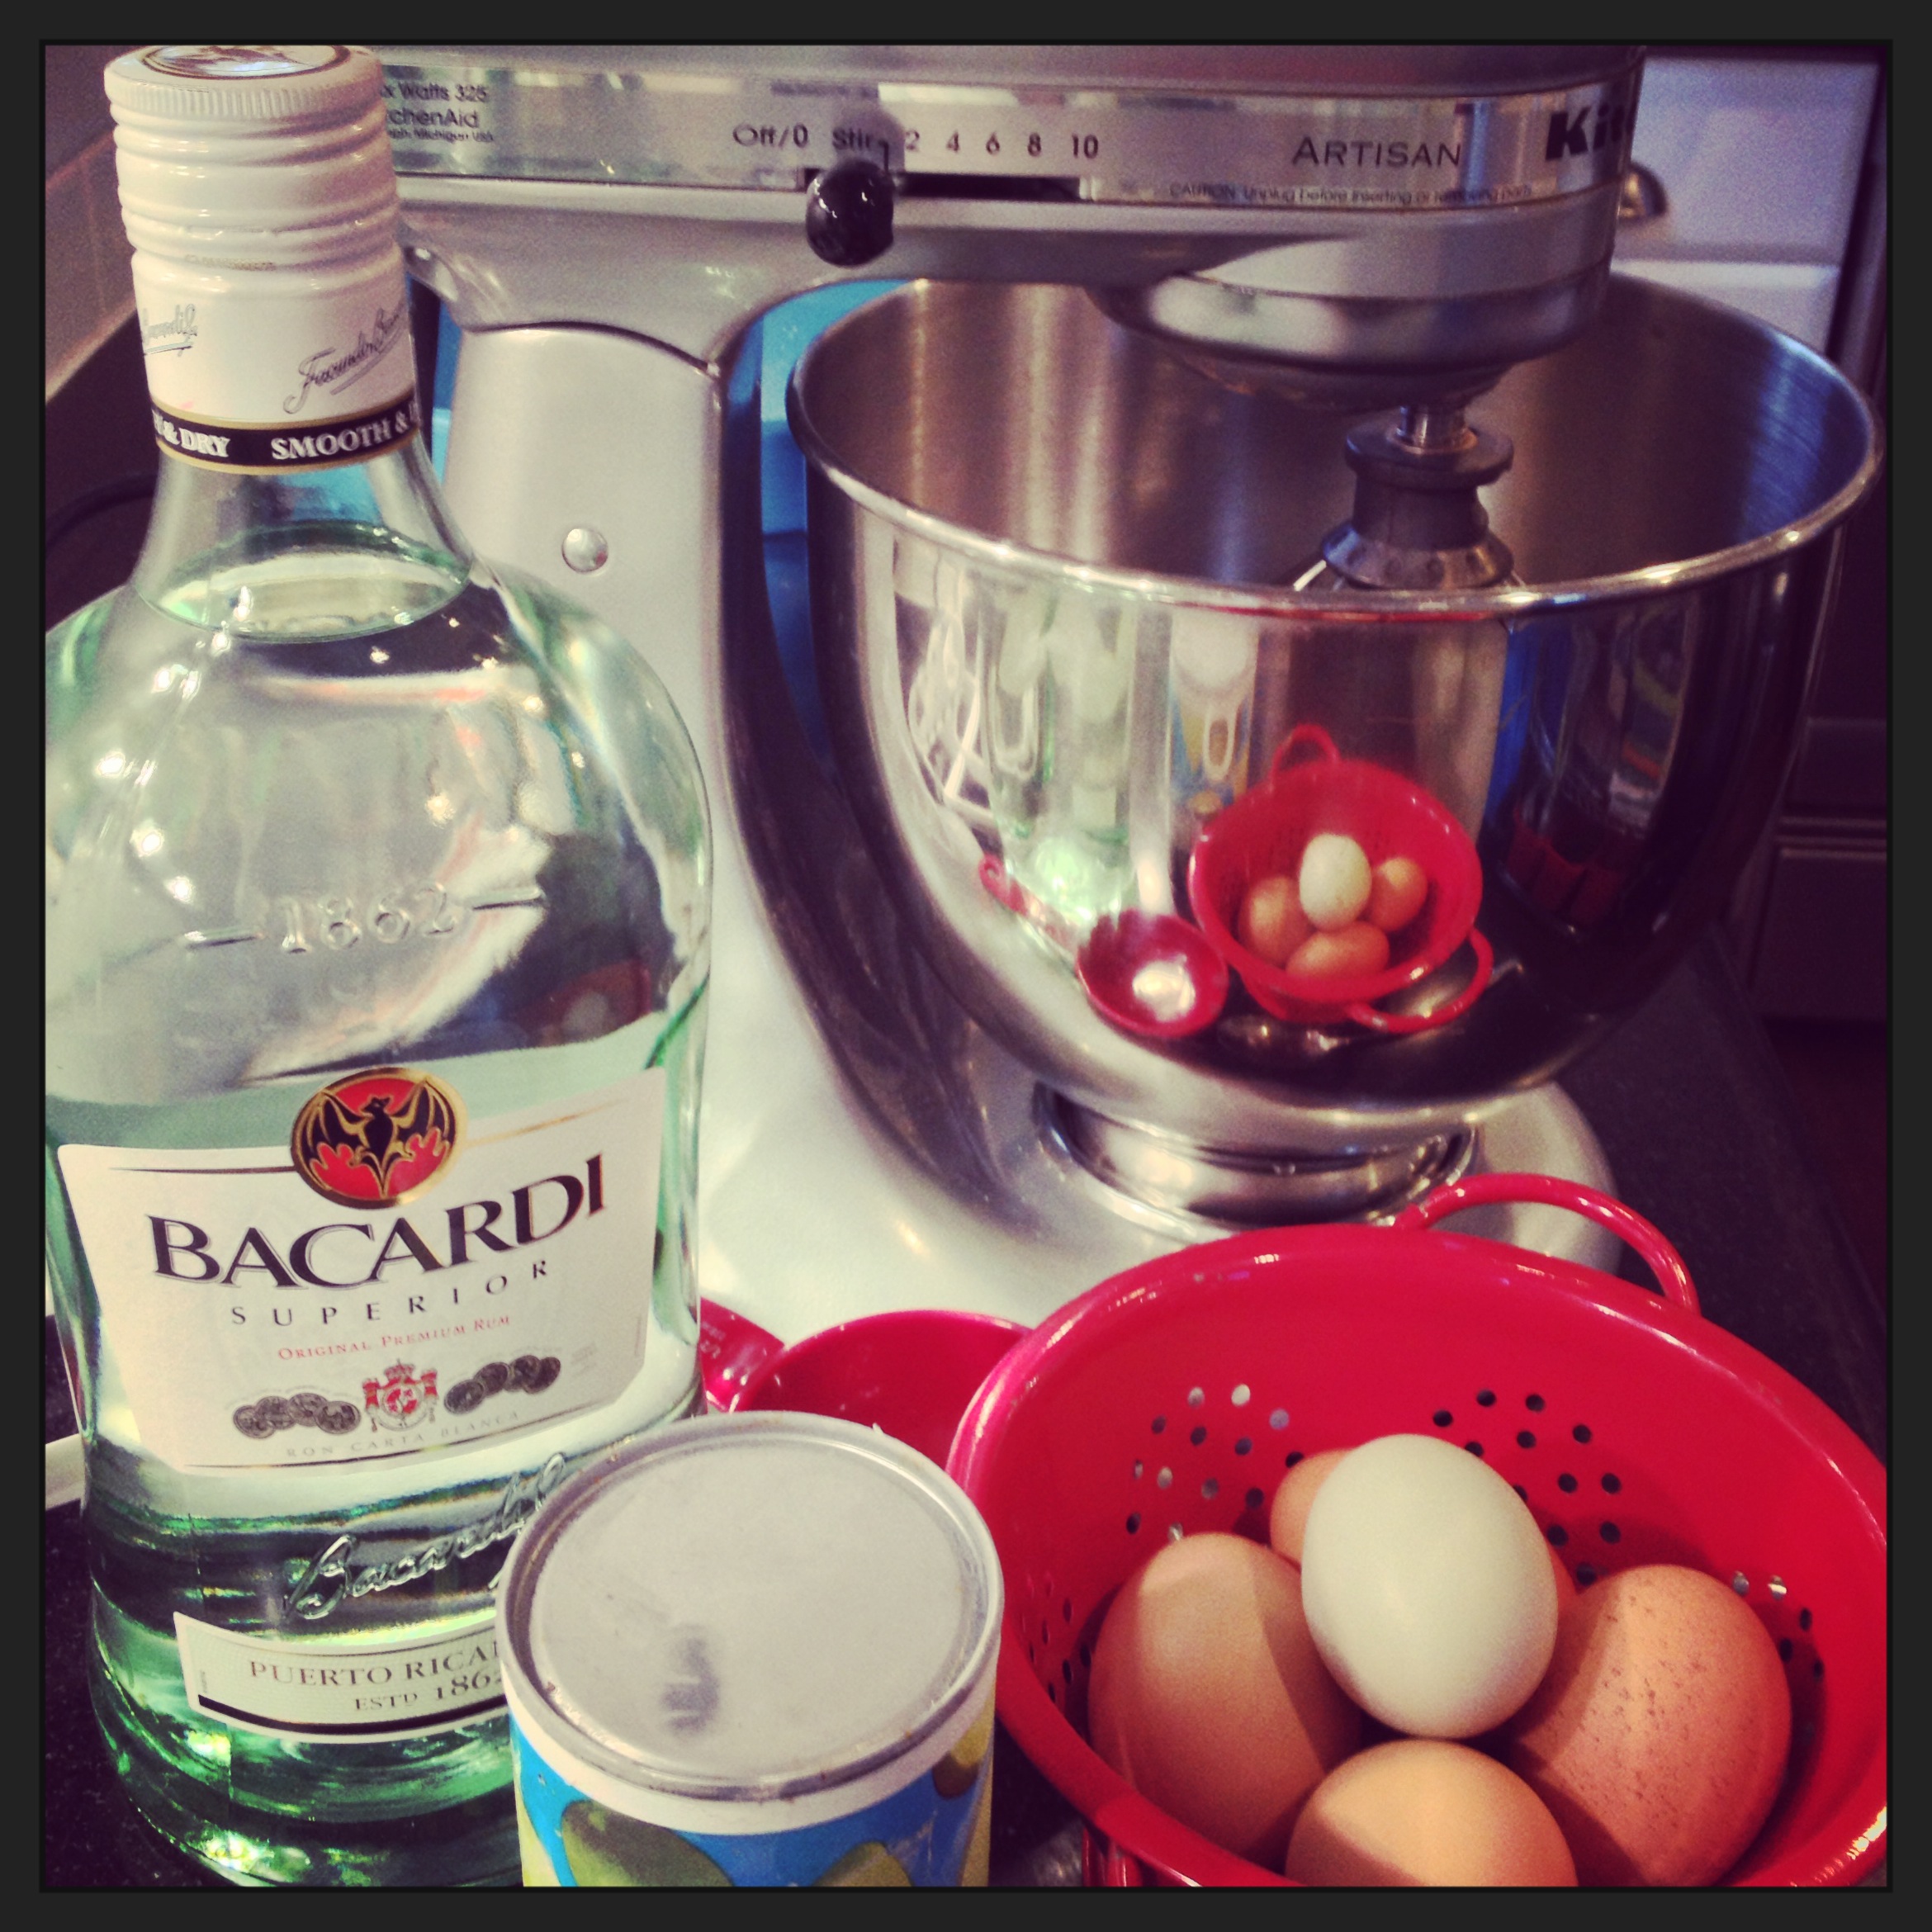
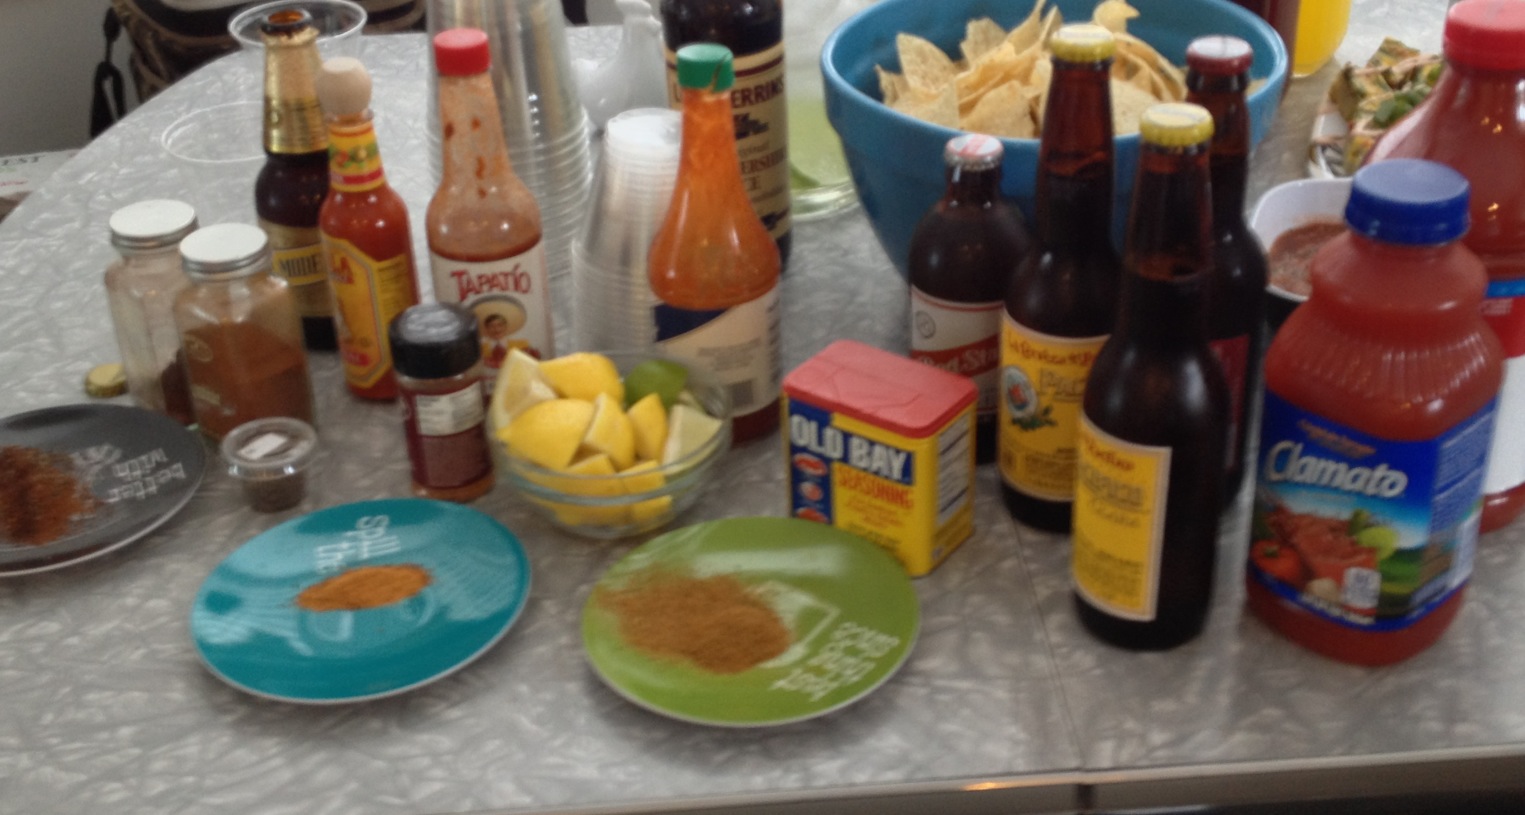
My buddy IPA (aka the beer blogger “Hoss on Hops“) and the other members of our sketchy beer club came over with their collective spouses and kids.  IPA supplied the brew from his seemingly magical beer fridge, and I provided all of the “Red Beer” fixin’s.  A Red Beer is basically brew mixed with any combination of tomato juice, Clamato (yes= clam juice + tomato), spice, and citrus.  Some folks like to have a 1 part tomato juice to 2 parts beer ratio.  Others go half-and-half, or mostly beer with a splash of tomato; or just beer, spice and lime (like a traditional Mexican-style Michelada).  That’s the great thing about the mixing bar- everyone gets it just the way they want it! Here are some of our favorite combinations:

  • Durango smoked sea salt rim; lime juice, Tapatio hot sauce; tomato juice; Negra Modelo beer
  • Old Bay spiced rim; lemon juice, Worcestershire, and Crystal hot sauce; Clamato juice; Red Stripe beer
  • Ancho chile powder and sea salt rim; lime juice, Cholula hot sauce; tomato juice; HopNotch IPA
  • Bacon salt rim; lemon juice, Worcestershire, Baron scotch bonnet hot sauce; a tiny splash of tomato juice; Carta Blanca or Pacifico beer

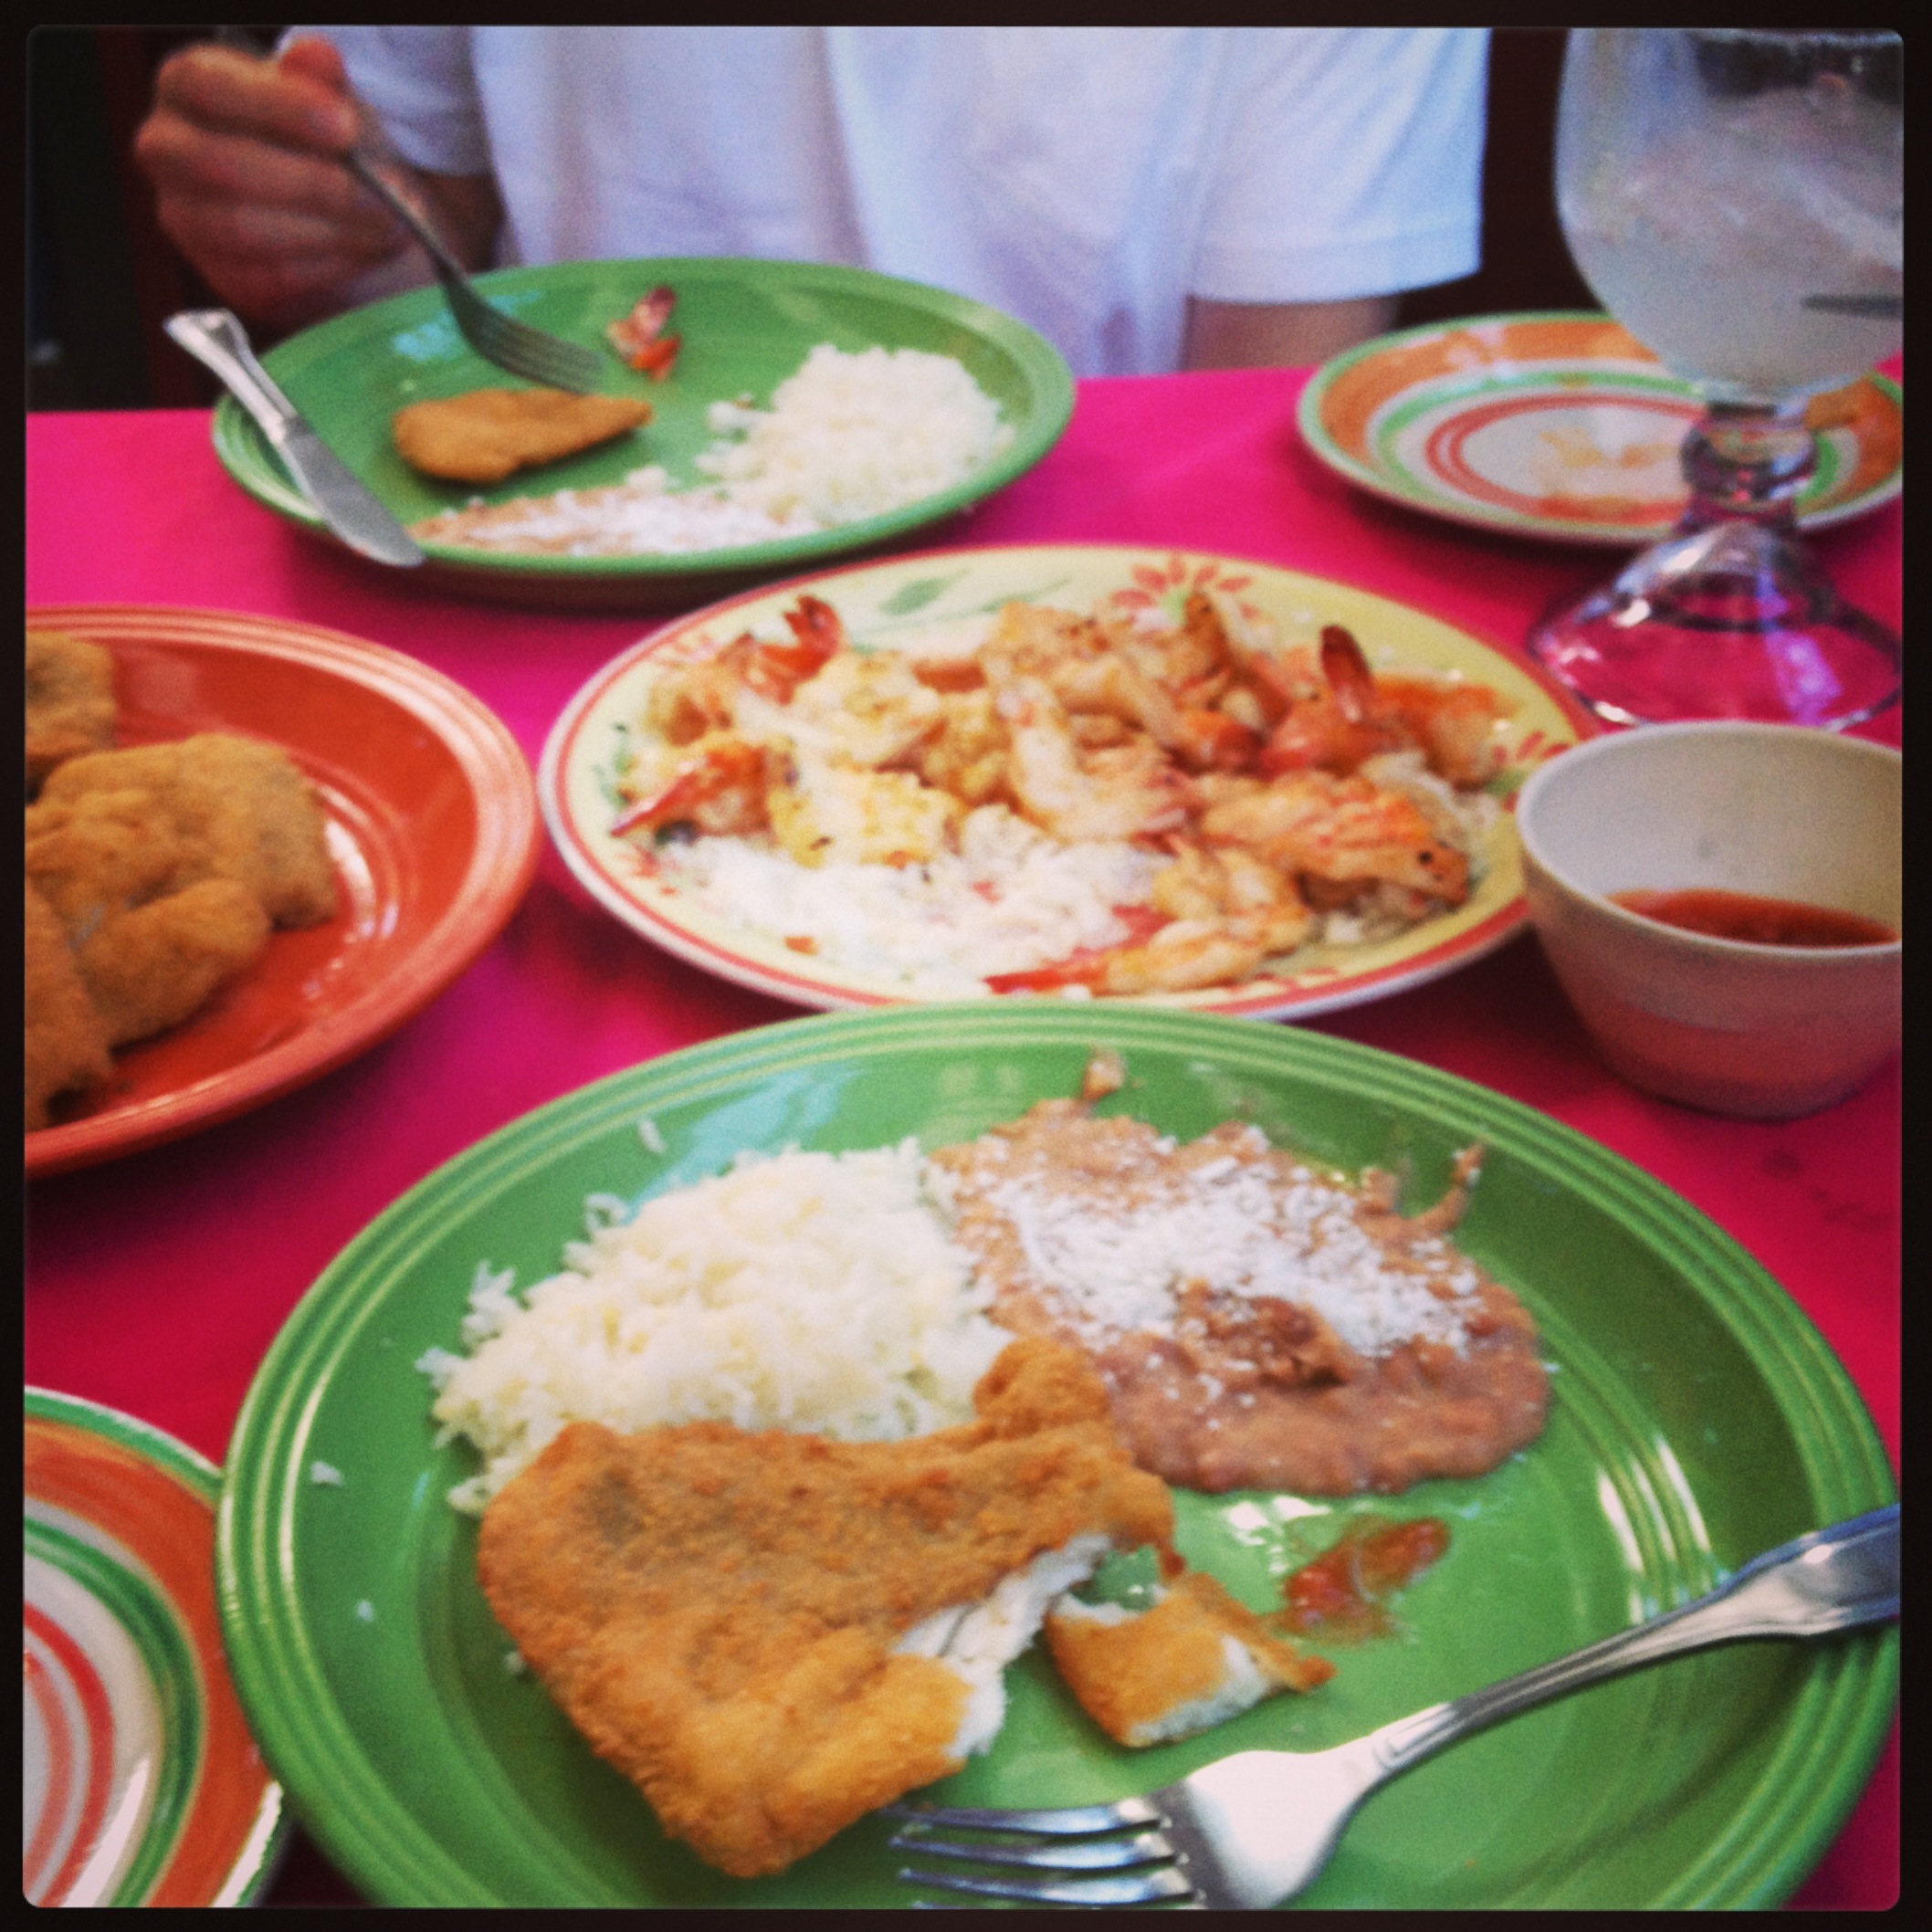
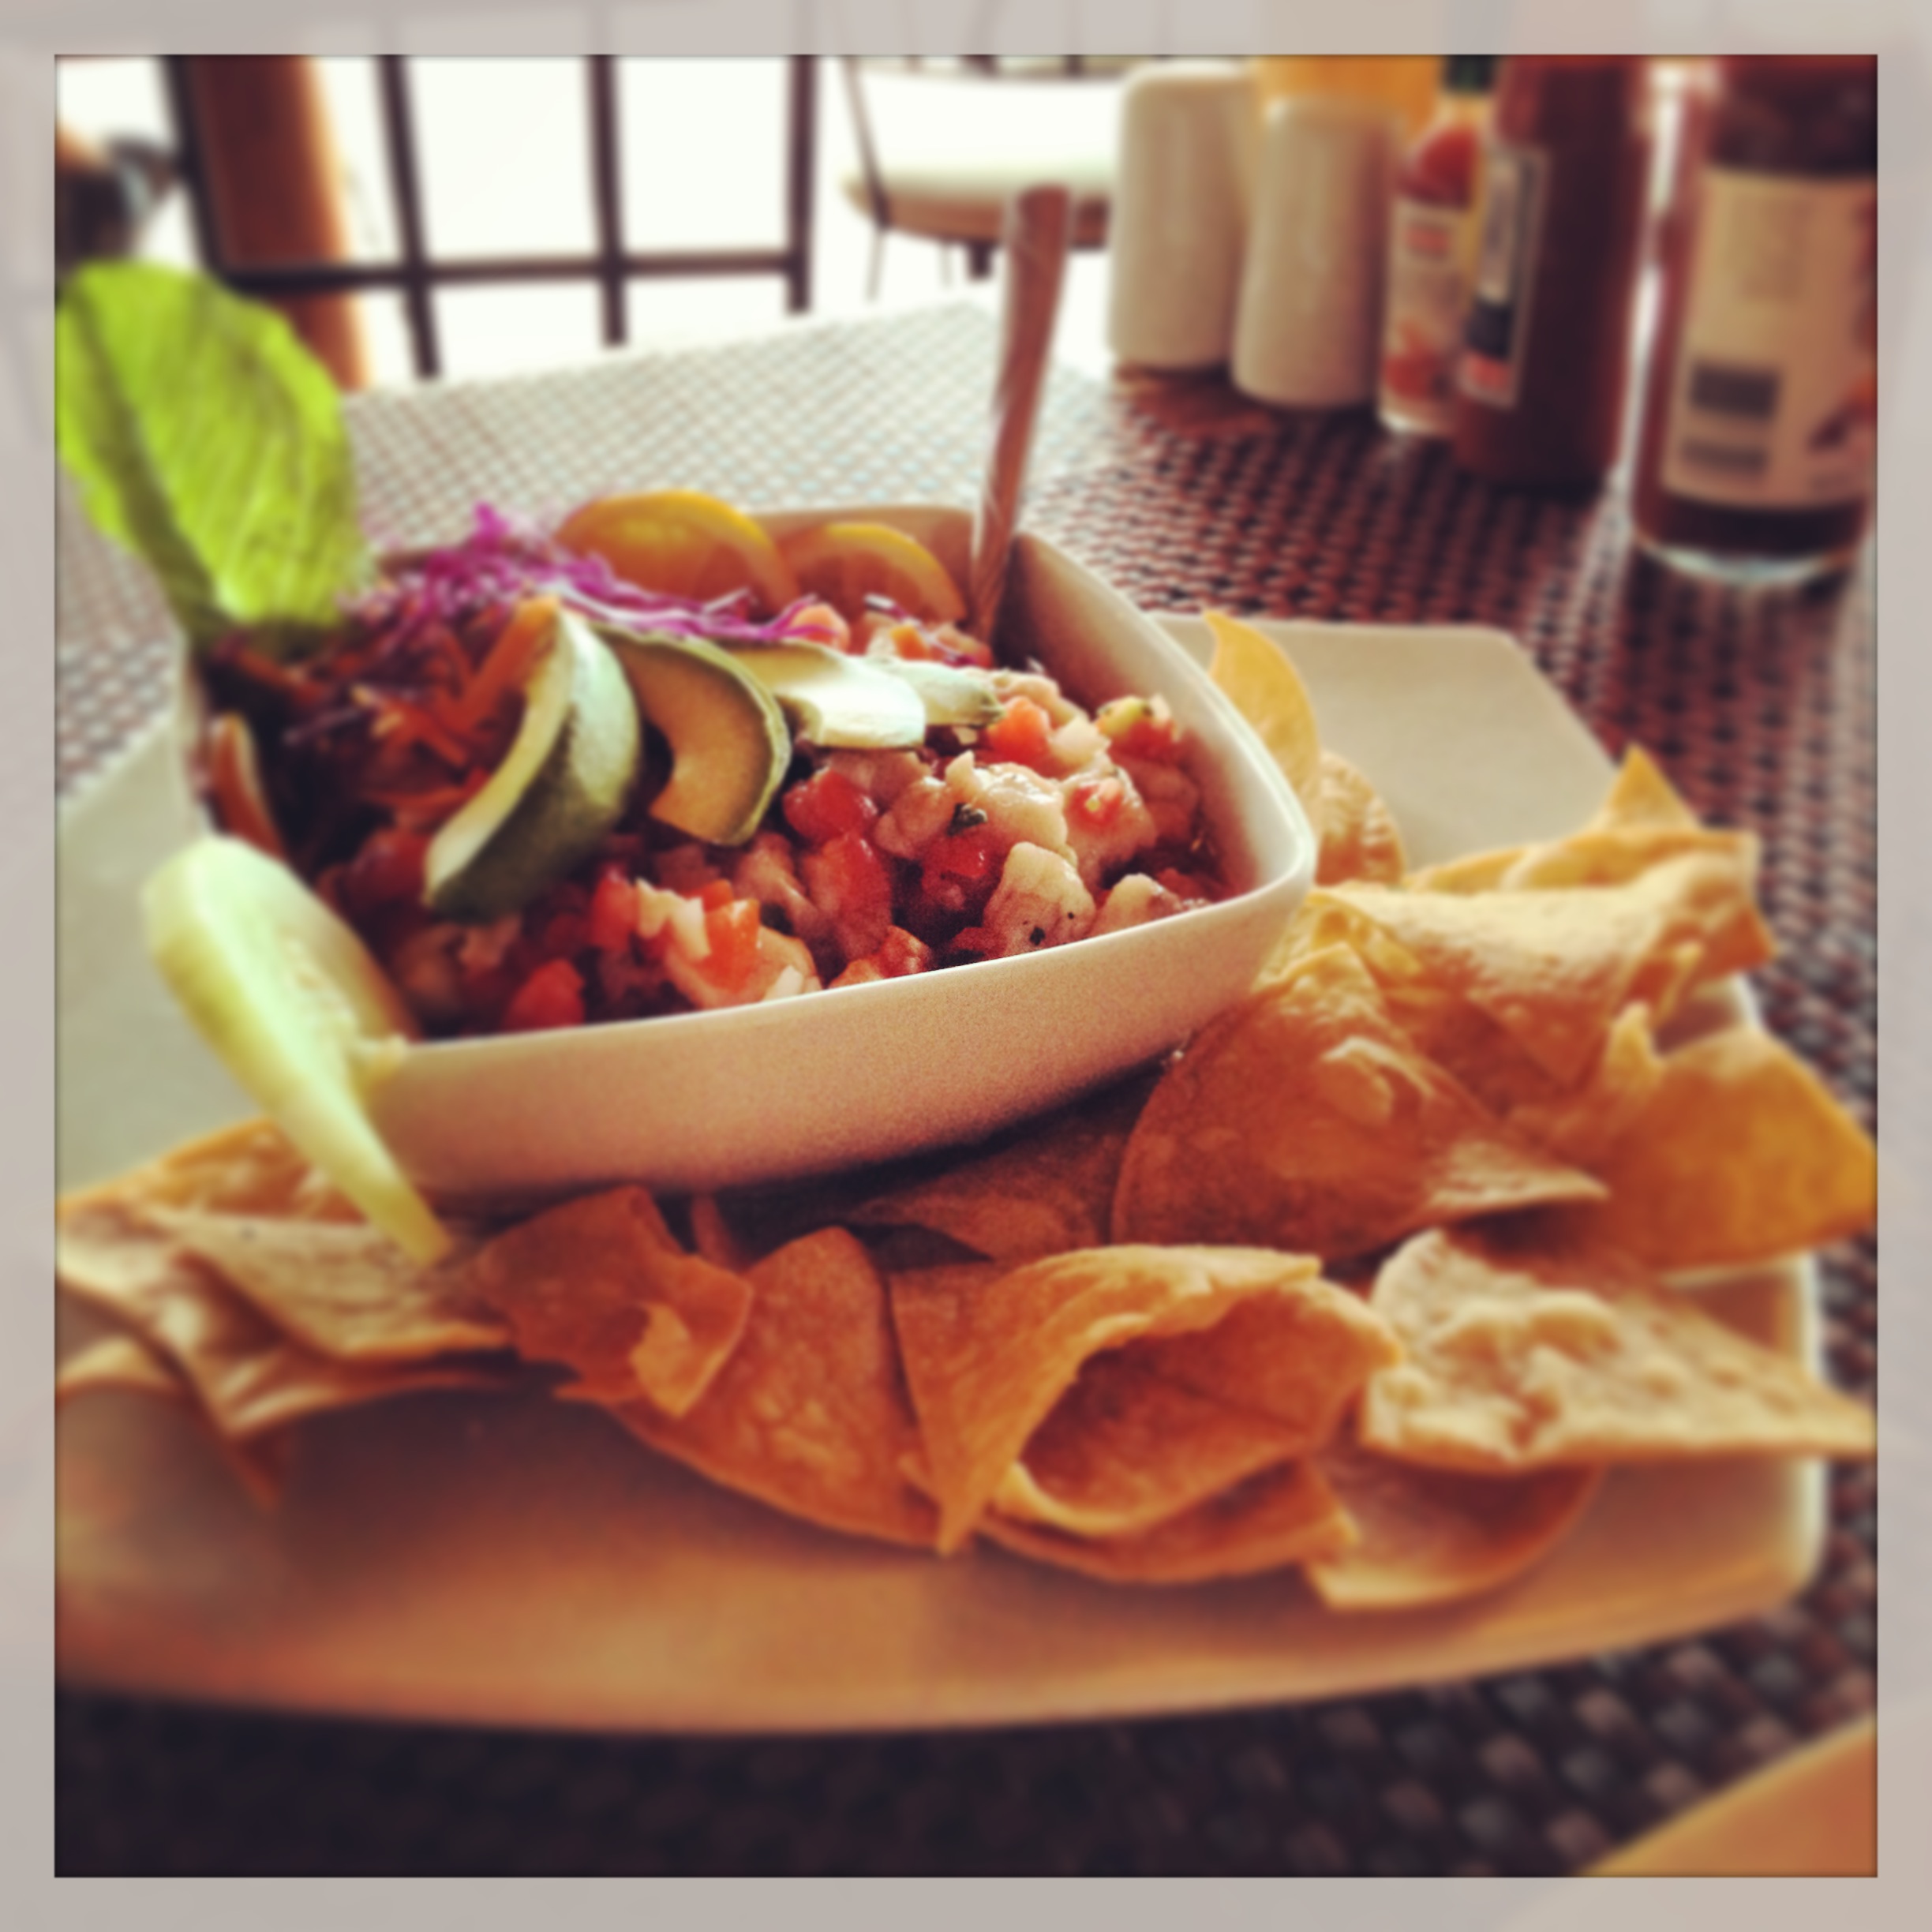
For nibbles alongside our cocktails, we kept it kid-friendly with chips and salsas.  I also made appetizer-sized bites of my modified Spanish-style potato tortilla, which can be made using dinner leftovers (keep those extra steamed potatoes, grilled peppers, and green beans. You’ll use ‘em!).

I set out a “build-your-own-sandwich” spread for grazing with lots of bread, deli meat, cheese, and condiment choices.  My gals Saketini and Lemon Drop brought delicious fruit and salads.  Clean-up was a snap.  I only used one vessel for actual cooking:  score!

Now, time for my nap.

 Layered Potato & Egg Baked Omelet (serves 8-10 as an appetizer)Layering your ingredients

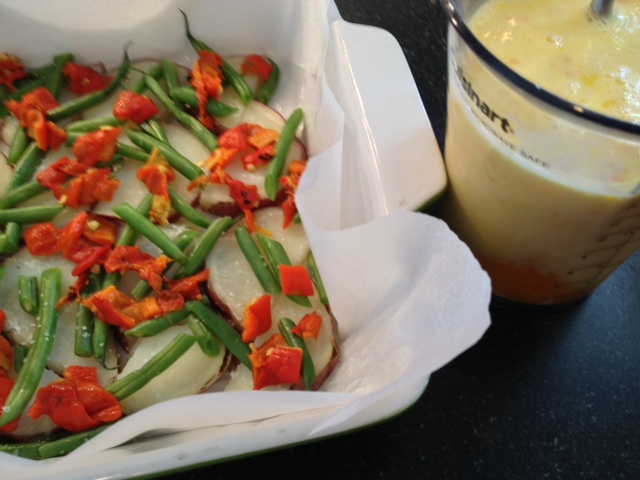
2 medium red potatoes (skin on) steamed until soft but still firm, sliced into 1/8” thick rounds

½ cup steamed thin green beans, cut into 1-2” long pieces

1 red bell pepper, seeded and chopped (or, if you like it spicy, two roasted red jalepenos – YUM!)

7 eggs

¼ cup half-and-half

2 tsp. kosher salt

½ tsp. fresh ground black pepper

½ cup plain Greek yogurt

2 Tbs. Sriracha hot sauce

½ cup chopped green onions

Method (Preheat oven to 350 degrees):

Spray a 9”x9” ceramic or glass baking dish with vegetable oil or cooking spray.  Line the bottom and sides of the dish with a sheet of parchment paper (this helps prevent the omelet from sticking and makes it easier to cut later).  Spray a light coating of oil on the parchment paper.

Layered Potato Baked Omelet with Sriracha sauce

Layered Potato Baked Omelet with Sriracha sauce

Spread the sliced potatoes in one layer equally over the bottom of the baking dish; overlapping pieces as necessary to fit them all in.  Sprinkle green beans and red pepper evenly over the top of the potatoes.  In a separate bowl, whisk together eggs, salt, pepper, and half-and-half until well combined.  Pour slowly over the vegetables to cover evenly.

Bake about 35-40 minutes, or until puffy and cooked through.

Meanwhile, combine yogurt and Sriracha sauce in a small jar or squirt bottle.  Shake to combine well.

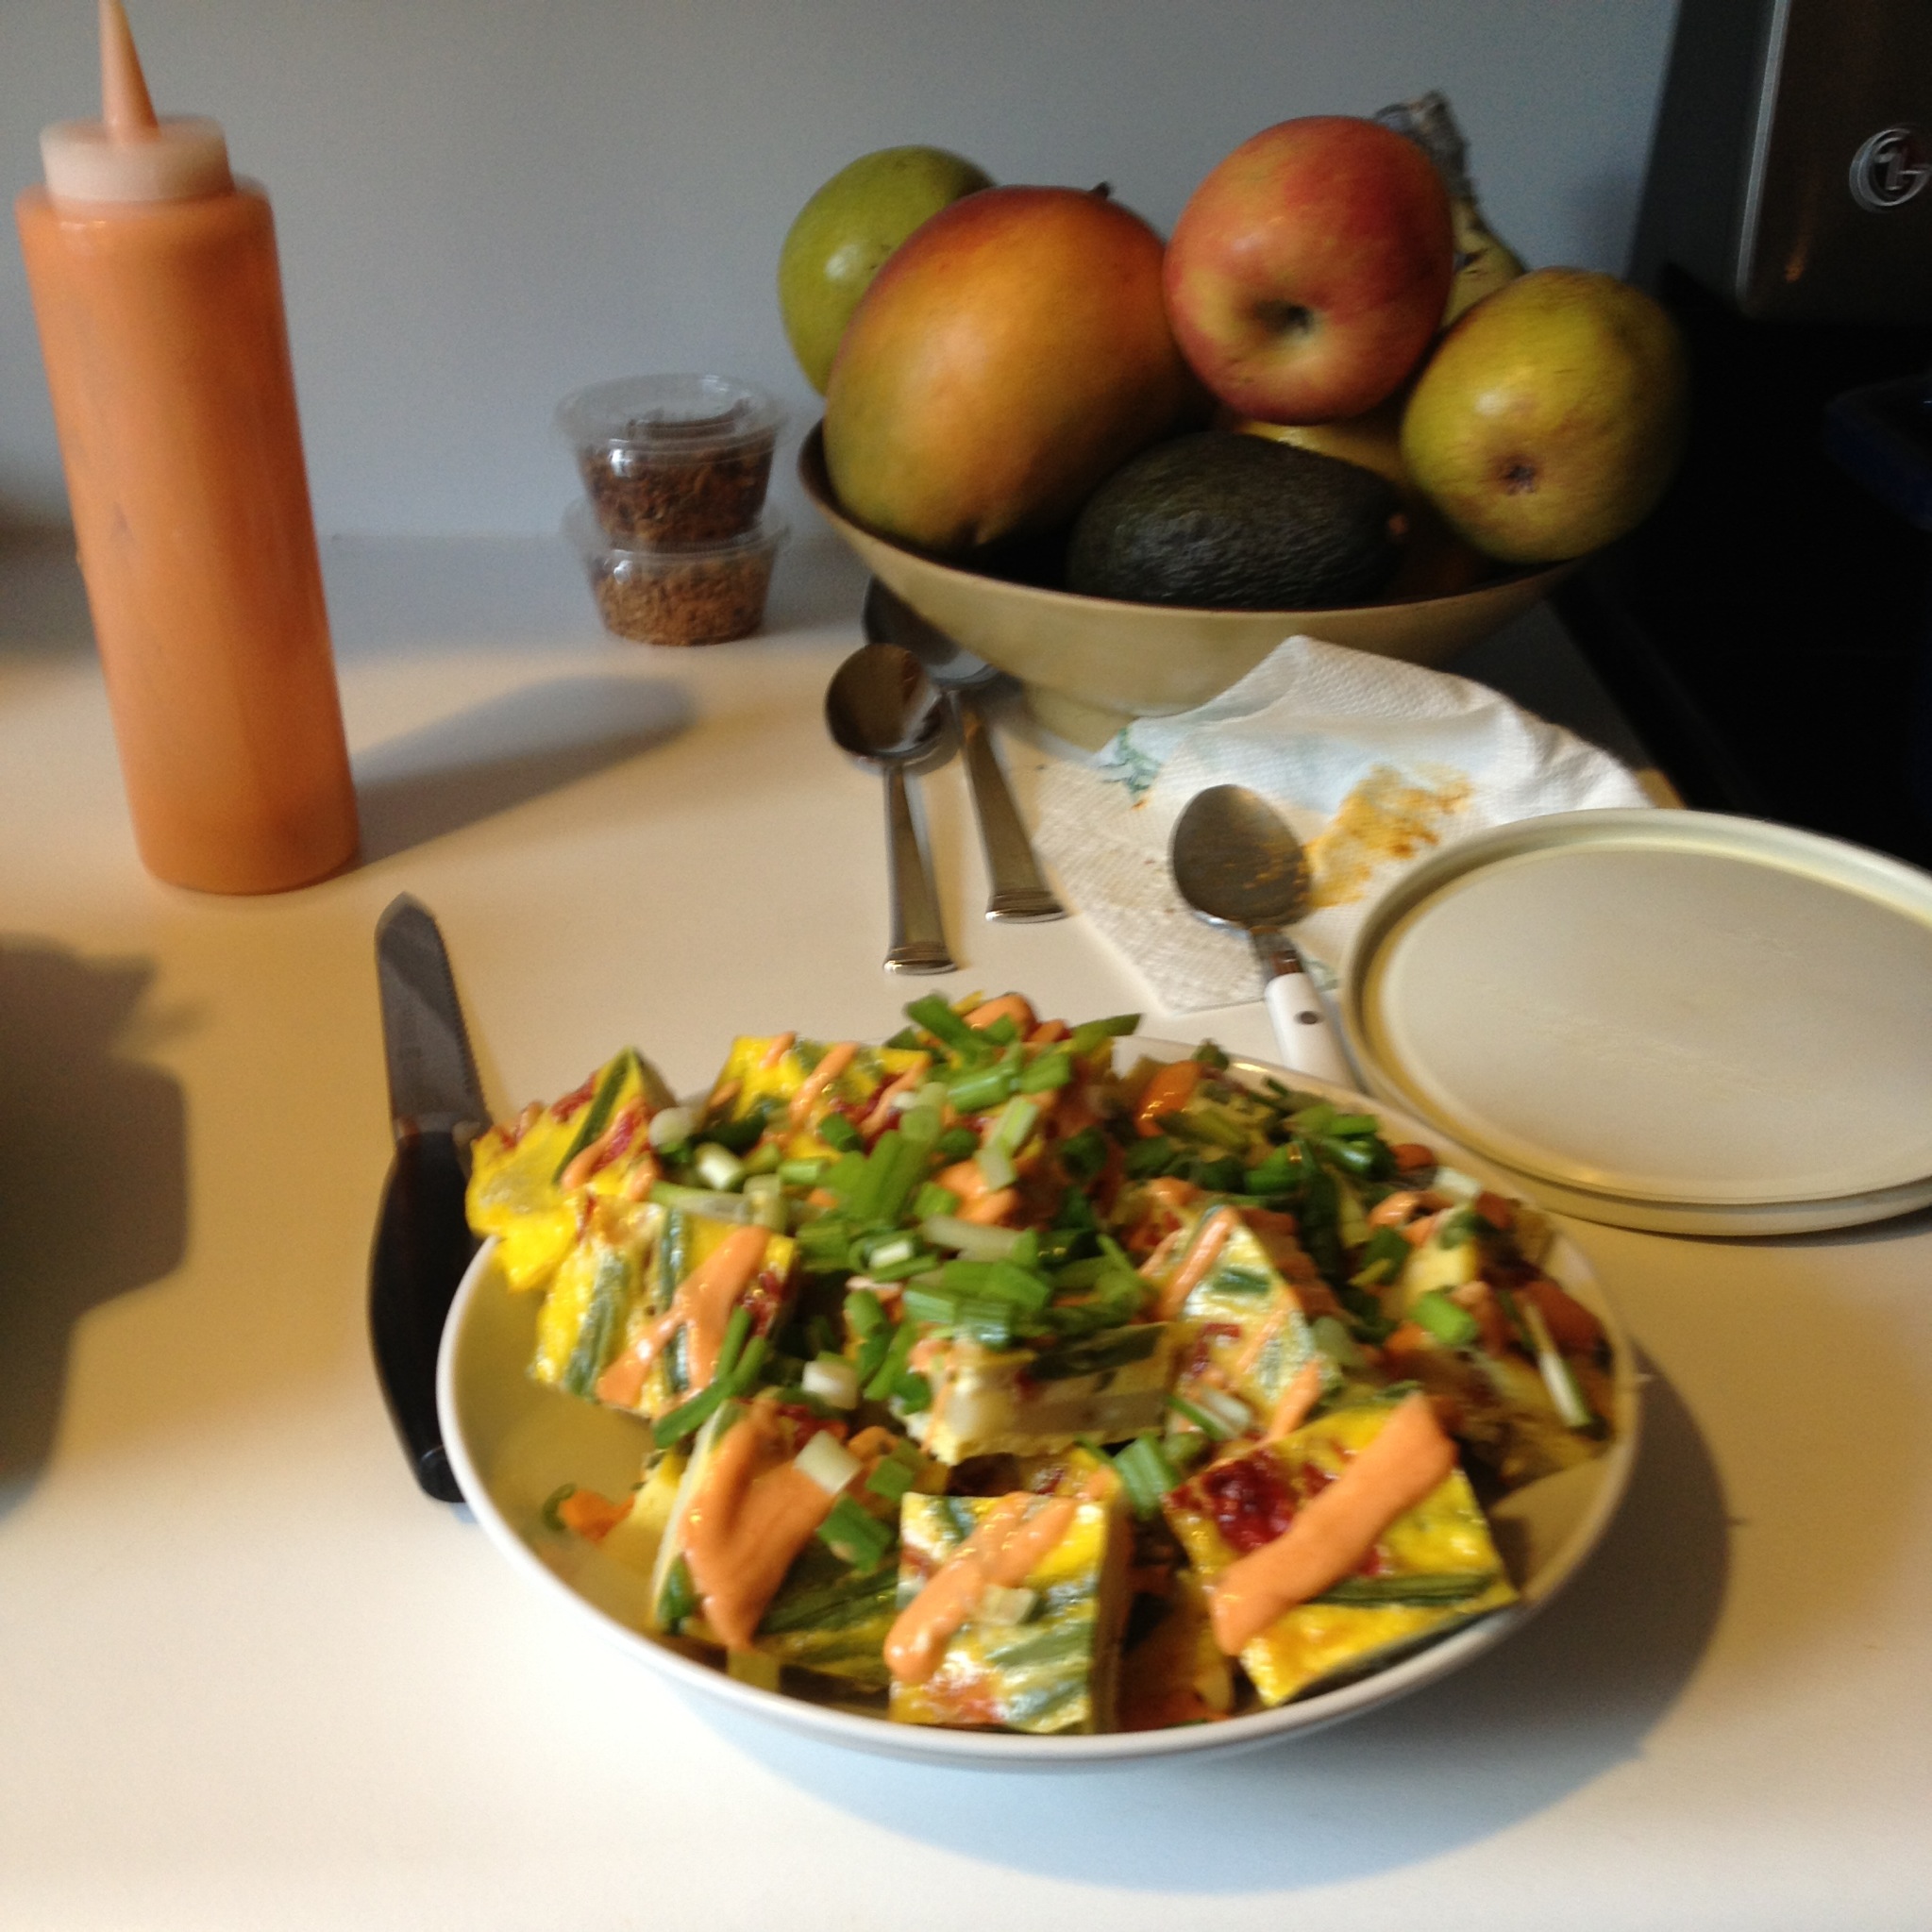
After the omelet is done, let rest on the counter until cooled enough to touch (about 15 minutes).  Invert onto a large cutting board, and gently remove parchment layer from the omelet.  Cut into 1” cubes with a sharp knife.

Arrange on a platter; drizzle generously with Sriracha-yogurt sauce; sprinkle on all the green onions.  Great warm or at room temperature (reserve sauce & onion garnish until just before serving).  Enjoy!

*LDS is the preferred abbreviation of The Church of Jesus Christ of Latter-Day Saints.  AKA, The Mormons.

Our first H.O.A.G.Y (Help Out a Gal/Guy, Yeah?): Cucumber Gimlet

Of course we take requests here at A Bourbon Gal!

My girlfriend Dirty Martini wrote me, “I can’t make a decent cucumber gimlet. Help!”

Cucumber Gimlet

Cucumber Gimlet

Now, first of all, my gal Dirty Martini has MAD cocktail skillz, so I’m sure her gimlet is pretty tasty, but she is always looking for a more-perfect beverage. And if you’re going to spring for some Very Good Gin (which she does, like Hendrick’s) you want it to be awesome.

Back in the day—meaning Prohibition, gin’s sparkly heyday—a gimlet was usually made with equal parts gin and sweetened lime juice. Another popular gin cocktail, the Gin Rickey, used almost equal parts gin, club soda, and lime juice. Post-WWII, gimlet recipes using lime juice with vodka and either powdered sugar or simple syrup often replaced gin-based cocktails.

Nowadays, if you order a gimlet at a bar you will get a multitude of options: gin or (usually) vodka, lime or another citrus (lemon, grapefruit), and any number of vegetal, herbaceous, and/or fruity additions. A harbinger of the summer party season, super-refreshing cucumber gimlets usually contain vodka, cucumber juice or purée, lime, and sweetener (sugar or syrup). With some pretty cucumber pinwheels in a tall narrow pitcher, cucumber gimlets are lovely made in bulk for quick and easy serving at your next garden party.

Cucumber Gimlet (makes one)

I like using those tiny thin-skinned “cocktail” cucumbers now available in most produce sections. Just a gentle wash and you are good to go: no peeling off the tough bitter skin or scraping out seeds needed. I also like how agave nectar distributes evenly through the cocktail with a nice finish.

1 “cocktail” cucumber, thinly sliced (reserve 2-3 thin slices for garnish), muddled furiously in the bottom of your cocktail shaker (really- juice the hell out of it)

1 tsp. fresh-squeezed lime juice (about ¼ lime)

½ tsp. agave nectar

2 oz. gin

4-5 cubes ice

Add all ingredients to a cocktail shaker. Shake until very cold and frothy. Strain into a martini glass containing 2-3 cubes fresh ice. Garnish with thin cucumber slices.

Suddenly Summer!: Cucumber-Basil Martini with a Salish smoked black sea salt rim

Cucumber Basil Martini

Cucumber Basil Martini

Holy hot spike, Batman!  We went straight from snow-covered daffodils to wilting tulips to hopeful tomato plants all in one day here in the Wasatch Mountains.  Even broke some early spring temps records yesterday.  In celebration (and yes, respite… I’m not quite ready for the 90s yet) I broke out some of my favorite summer flavors:  cucumber, basil, and the floral melody of gin.  I’ve wanted to try out some of my lovely salt collection for use on more than finishing pan-seared meats, roasted potatoes, and salad dressing.   These salts I’ve gathered mostly at my local Tony Caputo’s Market – where they thoughtfully provide 99 cent sample cups of various and sundry goodness so those fickle souls such as I can dabble and snack before commitment.   In this case, I used a finer-grained black Salish smoked sea salt on top of a cucumber-rubbed glass rim.  Delightful.  Yay for Spring!  Or at least the 3 hours of it we got this year.

A sampling of sea salts.  In this case, I used the Salish Black Smoked Sea Salt from Caputo's Market, but I also like the coarser grained Durango smoked grey salt for this cocktail.

A sampling of sea salts. In this case, I used the Salish Black Smoked Sea Salt from Caputo’s Market, but I also like the coarser grained Durango smoked grey salt for this cocktail.

Cucumber Basil & Smoked black sea salt Martini

Freeze a martini glass, or add to the glass several cubes of ice to chill and set aside.

Just before assembling, rub ½ of the glass rim with the cut edge of a cucumber and dip into the smoked sea salt of your choice.

 To a cocktail shaker, add:

1 small cocktail cucumber, sliced thin (about 4 slices of cucumber- reserve 1 slice for garnish)

4-5 leaves fresh basil

2 oz. very floral gin (I’m a fan of Broker’s for this cocktail)

½ oz. dry vermouth

4-5 ice cubes

Shake vigorously until well-frosted and frothy (about 15 seconds)

Strain into the chilled and salty goodness of that martini glass.  Garnish with a cucumber slice and a sprig of baby basil.

Isn’t that refreshing?

Now, don’t y’all put away your parkas and gloves yet, my mountain friends.  Just having made this cocktail guarantees we’ll have a freezing spell next week.  I’ve got my towels ready to cover my ‘maters, just in case.

Holy Mackerel! Tequila Ceviche

Several folks asked me why I didn’t use the perfectly wonderful opportunity of Cinco de Mayo to share some Southwestern and Mexican-inspired food and cocktail recipes on the blog.  After all, I lived in New Mexico for a while and for 8 years in Arizona.  But I didn’t get it done in time for the 5th because my man The Macallan and I were IN Cabo San Lucas, Mexico last week my friends, celebrating our 19th anniversary.  Without kids.  And quite frankly I was too busy fishing, reading on the beach, and drinking margaritas to send a remote post to the blog.  It was RESEARCH, y’all.

Me, my Roosterfish, and The Macallan's thumb.  We released this beauty, but ate a bunch of mackerel.
Me, my Roosterfish, and The Macallan’s thumb. We released this beauty, but ate a bunch of the mackerel we landed.

Cabo is justifiably famous for its spectacular sport fishing.  The Macallan originally proposed we’d fish four days, but I whittled it down to two with a possible third if we didn’t catch anything after two days.  We hired a guide service, Baja Anglers, for one full day exploring the spectacular beaches on the Sea of Cortez with Grant, and day fishing by boat off the coast of Cabo san Lucas with Capt. Alex and Luis.  We had a terrific time and caught a LOT of fish, which you can see photos of on the Baja Anglers blog (or follow me on Instagram at “abourbongal”).

Fresh-caught mackerel three ways: all of them delicious.

Fresh-caught mackerel three ways: all of them delicious.

After a long day of fishing, the last thing I feel like doing is going back to the rental condo kitchen with its lousy knives, matchbox-sized cutting board and sketchy non-stick pans.  Ugh.  In Cabo, several restaurants have “we’ll cook your catch” specials:  you proudly present your fishy triumph to the waiter and voila! 15-20 minutes later the chef sends out a delicious meal.  It doesn’t get much fresher than that.  At Solomon’s Landing, we had our fresh-caught mackerel prepared in ceviche, cooked with a lemon-pepper sauce, crusted with coconut and fried, and in a Spanish-style tomato based sauce.  The next day, we dined on mackerel cornmeal crusted and deep fried at Maro’s Shrimp House chased down with margaritas the size of our heads.

Battered and fried fresh mackerel, grilled shrimp, and huge margaritas at Maro's Shrimp House.

Battered and fried fresh mackerel, grilled shrimp, and huge margaritas at Maro’s Shrimp House.

Now that I’m back home, I’m more than happy to pull out my gorgeous cutting board and super-sharp hefty knives to do all of the slicing and dicing necessary to pull together my own citrusy ceviche.  Sure, it’s not going to be as fresh as we had in Cabo, but every delicious bite reminds me of Mexico.

Tequila Ceviche

Don’t skimp on the citrus juice here:  all of that acid is necessary to “cook” your fish.  After marinating for a while, you’ll see the fish change from grey to firm, opaque, and white.  A miracle of food science!  And please use fresh-squeezed juice, not that stuff in the bottle.

1 lb. firm fresh fish or shellfish (like snapper, halibut, scallops, shrimp, or any combination of these) cut into ½ inch cubes

½ cup fresh-squeezed lime juice (or a combination of lime & lemon)

3 medium tomatoes, seeded and diced

½ cup red onion, diced

1 jalapeño pepper, seeded and diced

A handful of fresh cilantro, chopped (about 1/8 cup)

1 Tbs. olive oil

A generous pinch of sea salt

A splash of tequila (about 1 Tbs.)

Mackerel Ceviche at Solomon's Landing, in the marina of Cabo san Lucas

Mackerel Ceviche at Solomon’s Landing, in the marina of Cabo san Lucas

To a non-reactive casserole dish (ceramic or glass), add all of the ingredients.  Very gently toss to coat.  Cover with plastic wrap and place in the coldest part of your refrigerator.  Stir again after 20-30 minutes to make sure all of the pieces of fish are covered with lime juice.   Depending on the type of fish and how big your cubes are, the ceviche should be ready in about an hour.  Garnish with avocado wedges and more fresh cilantro leaves, and serve with tortilla chips.  I like mine with plenty of heat, so I add a few shakes of Mexican hot sauce (like Tapatio) to my plate.

A Proper (and Improper) Mint Julep

Some people have fancy silver Julep cups passed down through many generations.  I have canning jars.

Some people have fancy silver Julep cups passed down through many generations. I have canning jars.

Towards the end of April I start getting all nostalgic about Kentucky Derby’s of my youth, singing (well, warbling) “My Old Kentucky Home,” and the weeks of debauchery Louisville celebrates leading up to the big day.  I’m getting misty eyed just thinking about it, but my friends here in Utah don’t quite get the appeal.  There’s a lot to love about my adopted mountain state, but a tradition of extended whiskey-soaked revelry is just not one of them.  And don’t y’all EVEN tell me Pioneer Day rallies the same hedonistic enthusiasm.  Just stop it.  Now.

Doesn't every 18 year old go through a phase when they want to be a great travel writer?  I read this the summer between high school and college and it blew my mind.  And gave me all sorts of ideas...

Doesn’t every 18 year old go through a phase when they want to be a great travel writer? I read this the summer between high school and college and it blew my mind. And gave me all sorts of ideas…

What’s Derby like?  Well, if you haven’t already, it’s a moral imperative you read Hunter S. Thompson’s 1970 essay, “The Kentucky Derby is Decadent and Depraved.”  It’s a marvel of sports reporting and travel journalism wrapped up in complete and utter sublime bullshit that stands the test of time more than forty years later.  And it’s Hunter S. Thompson drinking whiskey for three straight days.  See, nothing like Pioneer Day.

My secret to a fantastic Mint Julep?  Don’t kill your mint!  When I see someone grinding mint with a mortar into the bottom of a glass I just cringe.  It makes the mint bitter, and plus all of those little mint pieces invariably get stuck in your teeth and who wants that when you are wearing bright red lipstick and a fabulous hat?  A pert spank will do, instead, if you make minted simple syrup a day in advance.  You’ll love this stuff:  in addition to making superlative Juleps, minted syrup is perfect in Mojitos, iced tea, lemonade, and Arnold Palmers.

Minted Simple Syrup

In a big bowl or quart glass pyrex measure, add 2 cups boiling water to 2 cups granulated sugar.  Mix with a wooden spoon until sugar is completely dissolved.  Meanwhile, place 4-5 big sprigs of fresh mint in a quart-sized Mason or other lidded glass jar.  Once the sugar syrup is cool enough to touch comfortably with your fingers, pour over the mint.  Cool to room temperature, place the lid on the jar, and set in the refrigerator at least 4 hours or overnight.  Remove mint leaves, and store in the refrigerator for up to one week.

Minted simple syrup.  Boozemongering at it's finest, my friends.  You will use this freakalicious syrup in everything!

Minted simple syrup. Boozemongering at it’s finest, my friends. You will use this freakalicious syrup in everything!

A Proper Mint Julep

2-3 sprigs fresh mint

2 oz. Kentucky Bourbon

2-3 oz. minted simple syrup

“Spank” a sprig of mint between your hands (as if you are clapping), place in the bottom of a chilled silver Julep cup.  Fill the cup to the rim with crushed ice.  Slowly pour over the ice at the same time 2 oz. Kentucky Bourbon and 2-3 oz. minted syrup.  Spank another mint sprig and add as a garnish.  Gently stir the cocktail with a long handled stirrer until combined.

*Julep purists look away now.  Don’t say I didn’t warn you! 

I love making Juleps with Rye whiskey, too.  It gives them a little more bite, and is a nice counterpoint to the sweetness of the mint.

How pretty is that?!  The Strawberry Julep is perfect cocktail for a dinner by the grill, backyard bash, or lazy afternoon.

How pretty is that?! The Strawberry Julep is perfect cocktail for a dinner by the grill, backyard bash, or lazy afternoon.

An “Improper” Strawberry Julep

I made this cocktail for my girlfriends who complained that a traditional julep was too strong.  Meaning, they don’t like the taste of bourbon.  Sigh.  Convinced that I could make a bourbon-based cocktail they’d like, I threw this baby together.  Now everybody’s happy.

2 sprigs fresh mint

2 very ripe strawberries (plus an additional one for garnish)

1 ½ oz. bourbon

2 oz. minted simple syrup

Splash of club soda

In the bottom of a cocktail shaker, muddle two small very ripe strawberries until they are smooshy.  Add bourbon and mint syrup, one sprig of mint, and 2-3 cubes of ice.  Shake about 5-6 seconds.  Strain cocktail into a highball glass or Mason jar filled with ice.  Garnish with a sprig of “spanked” mint, a strawberry sliced almost in half to perch on the rim of your glass, and a splash of club soda if desired.

Mmm-mmm-mmm Mojito Ice Cream

Creamy zesty velvety goodness in 5... 4...3...2..YUM

Creamy zesty velvety goodness in 5… 4…3…2..YUM

Utahns are crazy for sweets, especially ice cream, frozen custard, and frozen yogurt.  I make this treat for my Mormon girlfriends when they’re feeling a bit subversive and rebellious.  It contains two whole tablespoons of rum!  As tempting as it is to add even more (and believe me, I’ve tried) going heavy handed on the liquor in this and most ice cream recipes messes with the freezing point of your concoction and you may end up with a gloppy mess instead of a smooth rich scoop.  Save that extra booze for your cocktail, instead.

mojito_ic_ingredientsMojito Ice Cream (makes 1 quart)

2 large eggs*

¾ cup sugar

2 cups half-and-half

1 cup heavy or whipping cream

½ cup frozen limeade concentrate, thawed

2 Tbs. white rum

2 tsp. peppermint extract

Zest from 1 lime (reserved until the very end)

In a mixing bowl, whisk the eggs until light and fluffy (2 minutes on med-high speed).  Keeping speed constant, whisk in the sugar a little bit at a time, and continue whisking until completely combined and pale yellow (about 1 minute more).  Reduce speed to low, and then slowly pour in the half-and-half and cream.  Whisk to blend, scraping the sides of the bowl. Add all the remaining ingredients EXCEPT the lime zest, whisk until thoroughly combined.

Transfer slowly to your ice cream maker.  Freeze and process following the manufacturer’s instructions.  When the ice cream is about done, sprinkle in the lime zest and processes another 1 to 2 minutes to distribute evenly.

Due to the high butterfat content of this ice cream, it benefits from storage in a case freezer if you’ve got one.  The texture

One of our five hens off to work (she has a very determined stride, no?)

One of our five hens off to work (she has a very determined stride, no?)

will be a little softer if it’s stored in your regular kitchen freezer but it will be equally delicious.

*This recipe includes raw eggs, which I have an abundance of from my healthy backyard hens.  You can use

pasteurized eggs from the supermarket if you’re worried about salmonella and other cooties.

Garden Stratigraphy “Cup” cakes

I have a love/hate relationship with Pinterest.  Yup, I’m on it, but I’m a lurker and re-pinner, not a post-er.  After a while, all that glossy perfection starts making me feel more than a little frustrated, insecure, and, well, like a big underachieving loser.  Who has TIME to do half of this stuff, let alone stage, light and professionally photograph it?  Especially since as you’ve probably already noticed, my photographs are strictly amateugarden cupcakesr hour, usually taken with my iPhone so I can also send ‘em right to Instagram or Facebook, or to be used in a completely inappropriate text message to a girlfriend.

My not-so-little anymore guy, Sprite, recently celebrated his 9th birthday, so months in advance he and I were pouring through Pinterest together trying to figure out what to make for his birthday cake (one of the three “B’s”: biscuits, brownies, and birthday cakes; reasons for which I will willingly and without whining, bake).  He didn’t like this, didn’t like that.  This, from a kid who is one of the perhaps 5 children in the United States who doesn’t like cake, but he is picky about what it will LOOK like.  Then, one day flipping through the TV channels he saw The Pioneer Woman making potted plant cakes for her daughter’s birthday.  “We should do that mom,” he said, “but completely different!”

This is what he came up with, no thanks to Pinterest.  He and his friends ate them up and asked for seconds.  So there, glossy perfection.  Take that.   

 Garden stratigraphy “cup” cakes

The boys loved these cakes because they were served in clear plastic cups so you could see all of the gooey crazy gummi goodness all the way to the bottom.  I loved it because it was insanely easy to clean up later; no mess from plates and scooping ice cream, and since 9 year old boys are notoriously difficult to make sit down and do anything for an extended period of time, it was perfect for a backyard party where they could wander around and eat at the same time.  You can use your favorite chocolate cake recipe for the cupcake layer, I used my standard go-to recipe to which I’ve been sworn to secrecy (sorry! I’m not going to burn a girlfriend over cake now matter how much y’all beg!)

Ingredients:

12 chocolate cup cakes

15 chocolate sandwich cookies, crushed up in a ziplock bag

3 packages Gummi ‘worms’

1 package Gummi ‘mushrooms’

About two-thirds of a ½ gallon container of lime sherbet or mint chocolate chip ice cream

Sprite adding the finishing touches

Sprite adding the finishing touches

1)      Prepare your favorite chocolate cake recipe to make 12 big cupcakes (you’ll have a little bit of batter left over to pour into a small baking pan for ‘bonus cake.’  Mmmm, bonus cake.)

2)      Bake and let cool completely for 4-6 hours or cover overnight.

3)      Set out ½ gallon of lime sherbet (Sprite’s choice) or mint chocolate chip (Tim Collins’ choice) ice cream to soften.

4)      In each of 12 clear plastic cups (we used 9 oz. cups) layer the following from the bottom up:

2 gummi worms

About 2 teaspoons of crushed cookies

1 cupcake, gently smashed down into the cup

2 more gummi worms (around the edge of the cup so you can see them)

2 more 2 teaspoons cookies

About 1/4 to 1/3 cup softened sherbet or ice cream, smoothed to cover the top of the cup

Top with 2-3 gummi mushrooms

5)      Place all of the cakes on a tray or baking sheet and keep in the freezer until ready to serve.  Let sit out about 5-10 minutes before serving to soften up the cake layers.

If you wanted to get all Pinterest-y, these would also look really cool in Mason jars.  Just sayin’.

Date Night: Gorgonzola stuffed dates with Whiskey Salami

My challenge, should I choose to accept it: 

My gal Saketini and her husband Smoked Porter have invited us over for dinner tonight with another couple, our friends IPA and Lemon Drop.    Saketini’s not given us much direction on what she’s making, but has asked Lemon Drop and me to bring appetizers.

What would A Bourbon Gal do?  Damn, I love a good food challenge.

Here are some other considerations before I put the knife to the board:gorgonzola and salami stuffed dates

1)      I didn’t see this text until half of the group conversation had gone by, so I’ve only got 2 hours left to prepare something.  Plus I still need to take a shower and get myself prettified.  Saketini and Lemon Drop always look gorgeous, so this is no small undertaking on my part (No baking or searing, check).

2)      We’re walking through our lovely neighborhood to their house, so my apps need to be backpack portable.  (Nothing fragile, check)

3)      My gal Lemon Drop will probably bring artichoke dip, so my contribution needs to pair well but not appear to be competitively spreadable or dippable.  (Stick to finger food or something skewered, check)

4)      It should go with the undoubtedly fabulous beer selection that Smoked Porter and our buddy IPA—who writes the fantastic beer blog Hoss on Hops—will assemble.  (Strong flavors, check)

Luckily, I sent my budding 11- year old gourmand, Tim Collins, to our neighborhood Emigration Market for some cheese and charcuterie the other day.  He’s a huge Creminelli Salami fan, and brought back one of their delicious uncured salamis and a nice chunk of imported Gorgonzola.  We have a few ounces of salami left and a nub of cheese.  I could totally do a quick nibbles board accompanied by some fruit and crackers, and that would be perfectly lovely if predictable and, quite frankly, sparse.   I’ve also got jars of my own go-to preserves and chutneys, but they’ve all had those a million times, and I’m down to only 3 ounces of gloppy-looking cream cheese to pour them over.  Plus, I’m out of crackers.  And good-looking fresh fruit.  And now, time!

What I need are some perfect little bites to share.  Something sweet and savory to balance Lemon Drop’s dip and crackers, but salty will go great with the beer.  And a bit hearty, too.  We’re feeding a firefighter and a beer blogger here; they need some sustenance!  Damn, this challenge is getting better every minute.  It’s like a real-life version of Chopped!  But without the ugly chef’s coats, sympathetic Ted Allen, lots of yelling “behind,” snarky eye rolling and side-commentary, and the dishy Marcus Samuelsson (sigh).  And I don’t have a blast chiller in sight.

The result?  Here, my friends, is your perfect 4-ingredient, pantry & fridge-scrounged, no baking required, highly durable, and very tasty bite (and I had time to make my hair look fabulous):

 Gorgonzola-stuffed dates with Whiskey salami

 1)      Slice 10-12 extra large dried dates in half length-wise; remove pits.  Place pitted side up on a platter.

2)      In a small bowl, mash together with a fork 3 oz. softened cream cheese and 4 oz. crumbled Gorgonzola cheese (also terrific with Maytag Blue)

3)      Remove casing from 3-4 oz. of Creminelli Whiskey salami (or other hard dry uncured Italian salami, any will do) and slice on the bias into very thin ovals. Slice ovals in half again to make half-oval strips.

4)      To assemble: scoop up about 1 teaspoon (this is very approximate folks, I don’t know how big your dates are!) of cheese mixture and gently scrape it with the back of a spoon into the center of your date half for the filling.  Top with a salami strip or two.  If you are packing these to travel, place a crumpled sheet of parchment paper between layers and pack gently in glass or plastic lidded containers.

Superlative Slope-side Bloody Mary*:

Bloody Mary

Bloody Mary

Spring brings along with it the dubious refined culture of the mid-day cocktail.  Think mint juleps, Planter’s punch, mojitos, and of course the hangover brunch standards:  Mimosas and Bloody Marys.  In my Memphis-based undergraduate days, we trained during much of the year to get ready for  studied diligently, then barely survived enjoyed a series of late semester parties, culminating in a music festival called “Rites of Spring.”  Awfully pagan for a church affiliated private liberal arts school, hmmm?  Good times.

I’ve moderated my own daytime drinking propensity in the decades years since in response to semi-responsible adulthood: graduate school, keeping a job, parenthood, PTA meetings, those goddamn pesky “empty” alcohol calories that every fascist nutritional resource tells you will haunt you and your belly fat thighs ass liver and muffin top mid-section forever.  And they do, my friends, they do.

But there are certain events in one’s life that call out for the return of day drinking an occasional mid-afternoon cocktail in its inherent subversive naughty splendor:  Super Bowl Sunday.  Mardi Gras.  The Kentucky Derby.   Volunteering at your kids’ school for “Pioneer Week” field trips.  Independence Day.

And, here in my adopted mountain home:  Spring Skiing.

Thanks to Brighton Ski Team for this great photo of the racers!

Thanks to Brighton Ski Team for this great photo of the racers!

Case in point.  Our family unit ventured to Grand Targhee, WY last weekend for an extended ‘Spring Fling’ two-day ski race event in which our older son, Tim Collins, competed.  We met up with about 10 other families from our home mountain and awesome guests.  We arrived at the mountain at 8:30 am each day to get our kids outfitted with their race speed suits, their racing bibs, their surly attitudes, and their appropriately-waxed skis.  Then the parents took turns trudging up the slope to set up a ‘base camp’ at the race finish—a good 200 yards straight uphill.  My man The Macallan valiantly delivered tent poles, coolers, and backpacks.  I mercilessly nagged supervised, and tried to finish my coffee before it cooled.

Waiting at the tent each morning after a couple of runs by noon, were the combined efforts of a few but mighty genius minds:  Gallons (yes, gallons!!) a pitcher of super-peppery homemade Bloody Mary mix,  several quarts of hooch hidden in duffle bags a bottle of Five Wives Vodka (Utah’s own artisan spirit), and some jalapeño-stuffed green olives for garnish.   Served in red Solo cups  non-breakable slope-side beverage containers, this was, my friends, the nectar of the ski gods.  Ullr and Loki were undoubtedly looking after us in their own pagan fashion:  Rites of Spring, now all grown up.  Kinda.

Slope-side Bloody Mary (makes 1, multiply as needed for your crowd) 

When I’m at home, I add a bacon-salt rim to the glass, just ‘cause you can and it’s delicious (Hello?  Bacon + salt !?).  Also great with Old Bay Seasoning.

In a cocktail shaker with 3-4 cubes ice add:

2 oz. vodka

One 5.5 oz. can original V8 juice

½  tsp. fresh lemon juice

¼ tsp. prepared horseradish

2 dashes Worcestershire sauce

2 dashes hot sauce (I like Crystal)

1 tsp. Okra pickle juice or green olive juice

A couple of generous cranks of fresh-ground coarse black peppercorns

A generous shake of bacon salt or Old Bay Seasoning

Shake until combined.  Pour the whole shaker into a heavy glass or red Solo cup.  Garnish with pickled okra and/or several skewered green olives.

Until next ski season, SKOL and Slainté, my friends! 

*Please imbibe responsibly, and for cripes sake watch your sodium levels.  We’re not getting any younger, you know.  Geez.

Applaud the Pod: Okra, okra, okra!

Okra:  Pickled, fried, and in a martini.   pickle okra_martini

My first introduction to okra was in the form of cornmeal-crusted deep fried bites in a Louisville diner.  Crunchy, salty, greasy goodness.  Yum.  After that, I looked for okra all over the South, trying the pod in its many and various forms:  stewed with tomatoes, with onions and spice topping rice, folded into gumbo, and of course, fried.  Deep fried, pan fried, fried in bacon fat or peanut oil.

As a grown-up, though, my absolute favorite okra treat is a crunchy, spicy, garlicky okra pickle.  Even better if it’s a whole skewer full of them lined up on the rim of a Bloody Mary glass, or on the advice of my girlfriend who we’ll call Tennessee Redneck Martini, in place of olives for a truly bodacious dirty martini.  If this doesn’t convert you to okra, then I gladly throw in the towel.

When we lived in Phoenix (down the street from my aforementioned girlfriend TN Red Martini) I grew okra right alongside my artichoke plants, collard greens, and rainbow chard.  The desert growing season being both long and hot enough there to produce a bumper crop every year, provided I spent plenty of time watering.  Seeing the combination of crazy purple artichoke blooms, variegated chard, and spiky outrageous okra plants taller than me made me smile every day: it was like my own personal Little Shop of Horrors-slash-Tim Burton garden.   I swear some days you could watch an okra pod grow in one afternoon – like zucchini, you’ve got to watch those little bastards because they will get woody and fibrous on you in a matter of days, if not hours.

Since moving to the mountains, my okra-growing days appear to be over (or at least limited), but that hasn’t stopped me from gathering up bushels of okra when I see them fresh at the Asian market or farmer’s market.  You can tell okra pods are fresh if they are uniformly green, and the tip end is firm (not bendable); also check for bruises and dark spots, which indicate they are past their prime.  The cut end of the pod should be firm; trim the end off of the stem end to clean, but do not pierce the pod.

After much trial and error, I can share the following suggestions for making your own pickled okra, and then wish you the best of luck. You can also buy perfectly good pickled okra at most grocery stores, but where’s the fun in that?

The actual canning part of making okra pickle is pretty straightforward.  Gently pack all of your ingredients into sterilized jars, and then pour over the pickling liquid and process as usual.  But okra are tricky little buggers, and it’s taken me years of practice to get them to behave.  They are susceptible to bruising and bursting, and are notorious floaters.  One friend claims that he has one jar explode in the canner every time.  On the other hand, another friend’s jars are routinely only half-full of pickling liquid after processing.  I’ve tried pricking the pods with a needle on the advice of grandmas (which does limit floaters, but tends to make the pickling liquid gluey and cloudy), hand-packing the pods in the same direction, or alternating directions.

My advice: place the flavoring ingredients in the bottom of your jar, first.  Gently pack okra one at a time in the jars, filling jars as full as you can (it doesn’t matter which direction, but I like them all lined up the same way because it looks pretty).  Put long pods in pint jars, and the baby ones in squat half pint jars.  Avoid squishing, bending, or bruising the pods.  Most recipes call for ½ inch of headspace AFTER removing air bubbles – I audaciously fill those suckers with pickle liquid right up to the rim.  Again, gently, poke around the pods with a chopstick to remove air bubbles, then recklessly fill the jars to the rim again.  Trust me:  there are inevitably air pockets around the okra no matter your chopstick skills, and the pods themselves are full of air.

Okay, here you go:

Crunchy & Spicy Okra Pickles (makes about 7 pints)

1)      Prepare canner; sterilize jars and lids

2)      In a large non-reactive (stainless steel) saucepan combine 6 cups water, 6 cups white vinegar, and 2/3 cup pickling salt; bring to a rolling boil, then reduce to a simmer

3)      Meanwhile, to each pint jar (or halve ingredients for ½ pint jars) add:  1 large clove peeled garlic, two tiny bird chilies, ½ tsp. dill seeds

4)      Clean and trim about 6 lbs okra pods, sort by size (see, above)

5)      Gently pack okra into jars, leaving at least ½ inch head space between pods and the rim of the jar

6)      Ladle hot pickling liquid into jars to the rim.  Poke a chopstick around pods to eliminate air bubbles.  Pour more liquid in to cover okra, if needed.

7)      Wipe rim with a sterile cloth; center lid on jar, and screw band down to finger tip tight

8)      Place jars in canner, making sure they are completely covered with boiling water.  Resume boil, and process for 15 minutes (In SLC I add another 6 minutes to adjust for altitude).

9)      Turn off burner.  Remove canner lid.  Let sit for 5 minutes.

10)   Remove jars, cool at room temperature for 24 hours (do not tip those jars, no matter how tempting!).  After 24 hours, test seals, then tip jars over on their sides & lids to release air bubbles and check that pickling liquid is covering most of the pods.  Store in a cool dark place for up to 1 year.

Tennessee Redneck Dirty Okra Martini (makes 1)

Rub half of the rim of a martini glass with a section of picked okra, dip the damp rim into a saucer dusted with Cajun or Creole seasoning.   In a cocktail shaker combine:  3-4 cubes ice, 2 oz. gin, a dash of dry vermouth (1 tsp., or to taste), and a slosh of okra pickle juice (about 1-2 tsp).  Shake vigorously for 8-10 seconds.  Strain into the martini glass, and garnish with skewered okra pickles.

This is a bit more involved than my eponymous gal makes- hers just has gin, okra juice, and an okra pickle in it and it is sublimely and simply delightful just like that.

Fried Okra

Cut 2 lbs. okra pods into 1” wide rounds.  Combine 2/3 cup cornmeal and 2/3 cup white flour.  Add 1 tsp. salt, 1 tsp. black pepper, and ½ tsp. cayenne pepper and mix thoroughly.  Toss all of the okra into the dredge and mix to coat.  Heat a cast iron skillet over med-high heat, and add 2 tablespoons of vegetable oil; heat over med-high until almost smoking.  Shake off excess dredge, and gently scatter a handful of okra into the hot grease.  Fry until golden, then remove to a paper-towel lined plate.  Keep on repeating until all your okra is done, adding more oil as needed, and turning down the heat if okra is getting too brown too fast.  Dust with additional sea salt while still steaming.  Eat right away.